Home Interior Wall Sconces: Stylish Lighting Ideas for Every Room

Home Interior Wall Sconces: Stylish Lighting Ideas for Every Room

Home interior wall sconces are one of those design details that can completely transform a room without requiring a major renovation. They provide practical lighting, add visual interest, and create a warm atmosphere that makes a home feel more inviting. Whether you prefer modern minimalism, classic elegance, rustic charm, or a luxurious contemporary style, the right wall sconces can help bring your interior design vision to life.

I used to think that ceiling lights and table lamps were enough to make a room look finished. However, wall lighting offers something different because it adds light at eye level, highlights architectural features, and creates depth that overhead fixtures often cannot achieve on their own.

The best part is that wall sconces work in almost every area of the house. You can install them beside a bedroom headboard, above a bathroom vanity, along a hallway, or next to artwork in your living room. With the right placement and design, these fixtures become both functional lighting and decorative accents.

In this guide, we will explore different home interior wall sconce ideas, explain how to choose the right fixtures, and share practical tips for creating a comfortable, stylish, and well-lit home.

What Are Home Interior Wall Sconces?

Wall sconces are lighting fixtures mounted directly onto walls. Depending on their design, they can direct light upward, downward, outward, or in multiple directions.

Unlike table lamps, sconces do not require furniture to support them. This makes them especially useful in compact rooms, narrow hallways, and areas where you want to keep surfaces clear.

Wall sconces are available in many styles, including modern metal fixtures, traditional candle-inspired designs, glass globe lights, fabric-shaded sconces, and adjustable reading lamps.

Some fixtures provide soft ambient lighting, while others offer focused illumination for reading, grooming, or displaying decorative objects.

Why Wall Sconces Are Worth Considering

Wall sconces offer several advantages for home interiors:

  • Save space: They free up nightstands, side tables, and console tables.
  • Create ambiance: They provide softer lighting for relaxing evenings.
  • Improve visual balance: They can frame furniture, mirrors, beds, and artwork.
  • Highlight architectural details: They draw attention to textured walls, decorative molding, or feature walls.
  • Add personality: Their materials, shapes, and finishes contribute to your home’s overall style.

I especially like wall sconces in rooms where the lighting feels too harsh or flat. Adding a pair of warm wall lights can make the space feel more layered without filling it with additional furniture or decorations.

1. Modern Minimalist Wall Sconces

If you love clean lines and uncluttered interiors, minimalist wall sconces are an excellent choice. These fixtures usually feature simple geometric shapes, neutral colors, and understated materials.

Look for slim cylindrical lights, rectangular LED fixtures, or small metal sconces with a matte finish. Black, white, brushed brass, and soft gray are popular choices for contemporary interiors.

Minimalist sconces work particularly well in modern bedrooms, living rooms, home offices, and hallways. Their simple appearance allows other design elements, such as furniture, artwork, and textured walls, to remain the main focus.

For a cohesive look, match the finish of your sconces with other details in the room. For example, black sconces can complement black cabinet handles, window frames, or furniture legs.

However, matching every finish is not necessary. A small contrast can make the design feel more intentional and less predictable.

2. Elegant Brass Wall Sconces for a Luxurious Interior

Brass wall sconces can bring warmth and sophistication to a home. Their golden tones look especially attractive against cream, beige, deep green, navy, and charcoal walls.

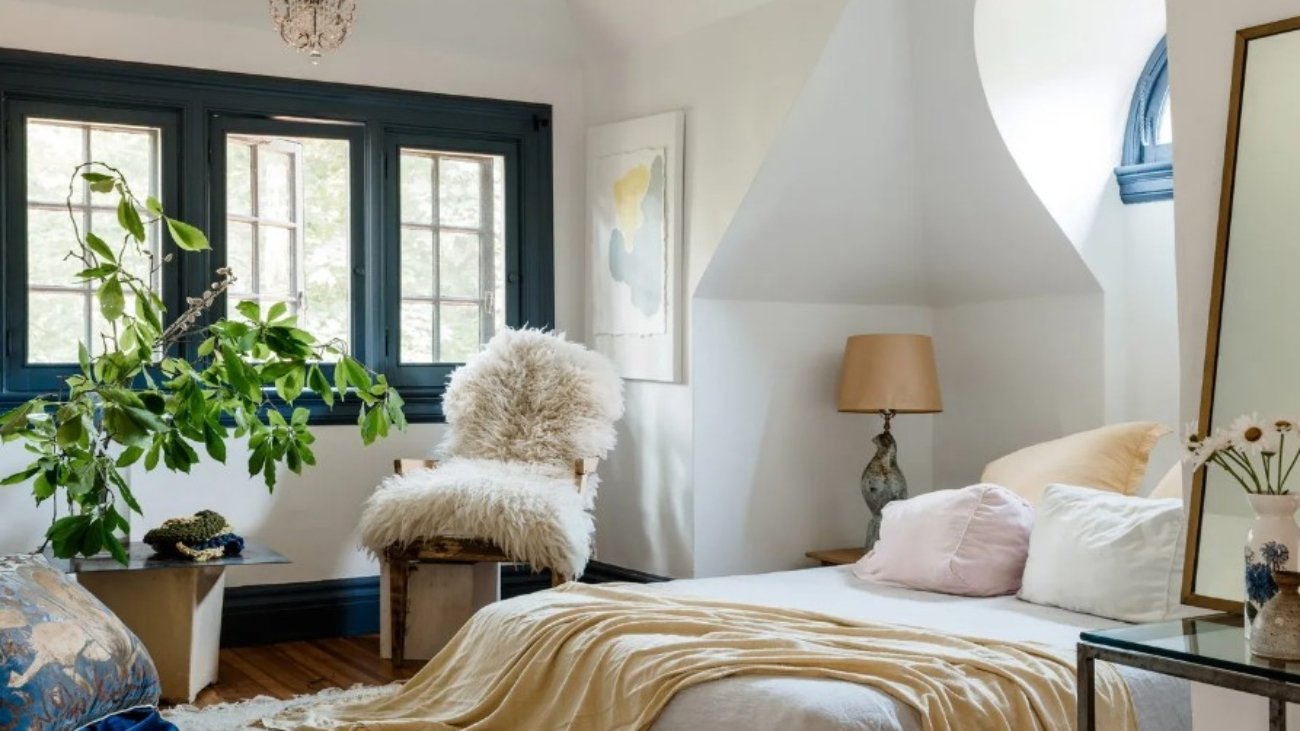
For a luxurious bedroom, consider installing brass sconces on either side of the headboard. Choose fixtures with white glass shades or frosted globes to soften the light and create a relaxing atmosphere.

In a living room, brass sconces can highlight a fireplace, decorative mirror, or artwork. They also work beautifully in transitional interiors that combine traditional furniture with contemporary finishes.

When selecting brass fixtures, pay attention to the finish. Polished brass creates a brighter, more glamorous appearance, while brushed or aged brass offers a softer, more understated effect.

One practical tip is to coordinate brass lighting with only a few other accents. A brass mirror frame, cabinet pull, or decorative tray can be enough to create a consistent look without making the room feel overly metallic.

3. Bedroom Wall Sconces for a Cozy Retreat

Bedrooms are among the best places to use wall sconces because lighting has a significant effect on comfort and relaxation.

Instead of placing lamps on both nightstands, mount sconces beside the bed. This arrangement saves surface space and gives the bedroom a neat, balanced appearance.

For a symmetrical design, install matching fixtures on either side of the headboard. If you prefer a more eclectic interior, choose complementary sconces with similar finishes but slightly different shapes.

Best Wall Sconce Styles for Bedrooms

Consider these options:

  • Adjustable reading sconces: Ideal for reading in bed without illuminating the entire room.
  • Fabric-shaded sconces: Create a soft, traditional appearance.
  • Globe sconces: Add a contemporary touch with rounded shapes.
  • Up-and-down LED sconces: Produce decorative light patterns on the wall.
  • Swing-arm sconces: Allow you to direct the light where it is needed.

For a comfortable bedroom, look for warm-white lighting, often around 2700K to 3000K. This color temperature generally creates a softer atmosphere than cooler, bluish lighting.

Placement is just as important as style. Position reading lights so they illuminate your book without shining directly into your eyes, and check that switches are easy to reach from the bed.

4. Living Room Wall Sconces That Create Ambiance

The living room is where wall sconces can make a particularly noticeable difference. They add another layer of lighting, helping the space feel inviting during evenings, movie nights, and casual gatherings.

Rather than relying entirely on a central ceiling light, combine wall sconces with floor lamps, table lamps, and indirect lighting. This layered approach gives you more control over the room’s atmosphere.

For a contemporary living room, consider sculptural sconces with curved metal arms or simple geometric forms. For a traditional space, fabric shades and antique-inspired finishes may feel more appropriate.

Wall sconces also work well beside fireplaces, built-in shelving, and large pieces of artwork. When placed thoughtfully, they can draw attention to these features without overpowering the room.

How to Position Sconces in a Living Room

The correct height depends on the ceiling, fixture size, furniture arrangement, and desired lighting effect. A common starting point is approximately 60 to 66 inches from the floor to the center of the fixture, although adjustments may be necessary.

Avoid positioning a sconce where its bulb creates glare while someone is sitting on the sofa. If the fixture is intended to highlight artwork, consider the beam direction and the distance between the light and the wall.

Dimmable fixtures are particularly useful in living rooms because you can adjust the brightness for different activities.

5. Bathroom Wall Sconces for Better Lighting

Bathroom wall sconces can improve both the appearance and functionality of your bathroom. They are especially useful around mirrors, where good lighting helps with shaving, makeup application, skincare, and other daily routines.

One popular arrangement is to install a sconce on each side of the bathroom mirror. This can illuminate the face more evenly than a single overhead light, which may create strong shadows under the eyes and chin.

For smaller bathrooms, compact vertical sconces can provide useful lighting without taking up too much visual space. In larger bathrooms, globe fixtures or elegant metal sconces can complement stone countertops, decorative mirrors, and contemporary cabinetry.

Choosing Bathroom-Safe Wall Lighting

Bathrooms contain moisture, so fixture selection requires extra care. Check the manufacturer’s damp-location or wet-location rating and follow local electrical requirements for the intended installation area.

The required rating depends on how close the fixture is to a shower, bathtub, or other water source. A fixture suitable for a dry hallway may not be appropriate near a shower.

Also consider the color rendering of the light. A high color-rendering index, such as CRI 90 or higher, can help skin tones and makeup colors appear more natural.

For most bathroom mirrors, a comfortable neutral-to-warm white light can work well, depending on your preferences and the room’s overall design.

6. Hallway Wall Sconces for a Welcoming First Impression

Hallways are often overlooked when planning home lighting. They may be narrow, lack natural light, or feel like empty passageways between more decorative rooms.

Wall sconces can solve several of these problems while making the hallway feel more thoughtfully designed.

Choose compact fixtures that do not project too far into the walking path. Slim up-and-down lights, small glass sconces, and understated cylindrical designs are practical options.

For a long hallway, repeat the same fixture at consistent intervals to create a sense of rhythm. The spacing should depend on the light output, beam spread, ceiling height, and the hallway’s length rather than following a fixed measurement.

In a short hallway, one carefully placed sconce may be enough to highlight a console table, mirror, or decorative wall.

If your hallway connects several rooms, use finishes that complement the lighting and hardware in nearby spaces. This helps the interior feel cohesive even when each room has its own personality.

7. Industrial Wall Sconces for an Edgy Interior

Industrial wall sconces are a great option for homes with exposed materials, dark accents, concrete finishes, or urban-inspired decor.

These fixtures often feature black metal, visible hardware, cage shades, and simple mechanical shapes. Some designs resemble traditional workshop lights, while others use modern LED technology to create a cleaner industrial look.

In a living room, industrial sconces can complement exposed brick, wooden shelving, or a dark accent wall. In a bedroom, adjustable metal sconces can add character while providing useful reading light.

You do not need an entirely industrial interior to make this style work. A pair of black metal sconces can create an attractive contrast in a room with white walls, light wood furniture, and soft textiles.

To avoid making the room feel too harsh, balance the metal finishes with warm materials. Natural wood, linen curtains, wool rugs, and upholstered furniture can soften the overall appearance.

8. Natural and Organic Wall Sconce Designs

If you prefer a calm, nature-inspired home, consider wall sconces made with natural-looking materials and organic shapes.

Rattan details, wooden accents, ceramic bases, linen shades, and softly curved silhouettes can create a relaxed atmosphere. These fixtures work especially well in Scandinavian, Japandi, coastal, and contemporary organic interiors.

Imagine a bedroom with warm white walls, oak furniture, textured bedding, and a pair of ceramic wall sconces. The lighting becomes part of the room’s natural palette rather than an isolated decorative feature.

For a living room, choose sconces with rounded shapes or subtle handmade details. Their imperfections and textures can add visual interest without making the room feel busy.

Keep in mind that the materials used in a fixture must be suitable for its installation location. Natural fibers and some decorative finishes may be inappropriate for damp environments or areas exposed to excessive heat.

9. Wall Sconces for Artwork and Feature Walls

Wall sconces can do more than illuminate a room. They can also draw attention to the parts of your interior design that deserve to stand out.

If you have a gallery wall, a large painting, or a decorative feature wall, consider using directional sconces to emphasize its details.

Picture lights are designed specifically to illuminate artwork, while adjustable wall fixtures can provide more flexibility. Some sconces produce a narrow beam, while others create a broad wash of light across the wall.

Before choosing a fixture, think about the artwork’s size, color, and material. Excessive heat or ultraviolet exposure can damage certain artworks, so select suitable LED fixtures and follow the artwork’s conservation requirements when necessary.

For textured walls, such as stone, brick, or decorative plaster, directional lighting can emphasize surface details through shadows. This technique is particularly effective when you want the wall itself to become a focal point.

A good rule is to test the lighting angle before final installation whenever possible. Small adjustments can significantly change the appearance of the wall.

10. Small-Space Wall Sconces That Save Room

Wall sconces are especially valuable in small homes, apartments, and compact bedrooms because they provide lighting without occupying valuable floor or tabletop space.

For example, a narrow bedside table may have room for a phone and a glass of water but little space for a lamp. A wall-mounted fixture solves the problem while keeping the furniture surface clear.

In a small living room, wall sconces can supplement floor lamps without crowding the walking area. In a compact entryway, a small fixture can add light without interfering with a coat rack or shoe cabinet.

Tips for Small Rooms

  • Choose fixtures that are proportionate to the wall and nearby furniture.
  • Avoid oversized shades that make narrow spaces feel crowded.
  • Use light-colored finishes when you want the fixtures to blend into the wall.
  • Consider adjustable arms when you need task lighting in multiple directions.
  • Use dimmers or compatible smart bulbs to adjust brightness for different activities.

Small rooms also benefit from consistent lighting styles. Using similar finishes in connected areas can help the home feel more spacious and visually organized.

11. Up-and-Down Wall Sconces for Dramatic Effects

Up-and-down wall sconces direct light toward both the ceiling and the floor. They are popular in contemporary homes because they create attractive patterns on the wall.

These fixtures can make a plain surface look more interesting without requiring wallpaper, artwork, or elaborate decoration.

Install them on a feature wall, in a hallway, or beside a staircase where their light patterns can be appreciated.

Home Interior for Bedroom: Beautiful Design Ideas for a Cozy and Stylish Space

Home Interior for Bedroom: Beautiful Design Ideas for a Cozy and Stylish Space

Your bedroom should be more than just a place to sleep. It’s your personal retreat, the room where you start your mornings, unwind after a long day, and enjoy a little peace away from the rest of the world. Creating a beautiful bedroom interior doesn’t necessarily mean buying expensive furniture or following every new design trend. Sometimes, a few thoughtful changes can make a remarkable difference.

I’ve always believed that a well-designed bedroom comes down to three things: comfort, functionality, and personal style. A beautiful bed is important, of course, but so are the lighting, wall colors, storage solutions, and little decorative details that make the room feel like yours.

If you’ve ever looked at a bedroom in a design magazine and wondered how to achieve something similar at home, you’re not alone. The good news is that you can borrow plenty of professional interior design ideas without spending a fortune.

In this guide, we’ll explore practical home interior ideas for bedrooms of different sizes and styles, from modern minimalist spaces to warm, luxurious retreats. You’ll also discover useful furniture arrangements, color combinations, lighting tips, and affordable decorating tricks to help you create a bedroom that looks attractive and feels comfortable every day.

1. Choose a Bedroom Interior Design Style

Before purchasing furniture or changing the wall color, decide what kind of atmosphere you want to create. Having a clear design direction helps you choose items that work together instead of ending up with a room full of beautiful pieces that don’t quite match.

Modern Minimalist Bedroom Interior

A modern minimalist bedroom focuses on simplicity, clean lines, and practical furniture. Instead of filling the room with decorations, this style uses a few carefully selected pieces to create a calm and organized environment.

Think of a low-profile bed, a simple nightstand, neutral walls, and hidden storage. White, beige, light gray, and muted green are popular colors for this look because they create a soft background without overwhelming the space.

One thing I like about minimalist bedroom design is that it encourages you to be selective. Rather than buying five decorative accessories, choose one framed artwork, a beautiful bedside lamp, or a textured throw blanket that makes the room feel finished.

Scandinavian Bedroom Design

Scandinavian interiors combine simplicity with warmth. Natural wood, soft textiles, comfortable furniture, and plenty of light are common features of this style.

A Scandinavian bedroom might include a light oak bed frame, white walls, cream bedding, and a textured rug. Add a few green plants or simple framed prints to bring personality into the space.

The trick is to avoid making the room feel too cold. If everything is white and smooth, introduce knitted blankets, linen curtains, woven baskets, or wood accents to create more depth.

Contemporary Luxury Bedroom

A luxurious bedroom doesn’t have to be enormous. You can create an elegant atmosphere in an ordinary-sized room by combining thoughtful lighting, quality-looking fabrics, balanced colors, and a strong focal point.

An upholstered headboard, layered bedding, matching bedside lamps, and full-length curtains can make a bedroom feel more refined. Colors such as warm beige, charcoal, cream, forest green, and muted gold are especially useful for this style.

If you’re decorating on a budget, focus on the bed first. Since the bed usually occupies the largest area of the room, an attractive headboard and neatly layered bedding can have more visual impact than several small decorative purchases.

Cozy Rustic Bedroom

Rustic bedroom interiors emphasize natural materials and a relaxed atmosphere. Wooden furniture, linen bedding, woven baskets, and earthy colors help create a space that feels warm rather than overly polished.

You might combine a wood bed frame with cream bedding, terracotta accents, and a soft bedside lamp. Natural imperfections in wood can add character, so you don’t necessarily need furniture that looks perfectly uniform.

This style works particularly well if you enjoy a farmhouse, cottage, or nature-inspired interior.

2. Select the Best Colors for Your Bedroom

Color has a major influence on how a bedroom looks and feels. The right palette can make the room appear brighter, create visual depth, and help the furniture and decorations feel connected.

Before choosing paint, consider the amount of natural light, the color of your flooring, and the furniture you already own.

Soft White and Cream for a Bright Bedroom

White and cream are reliable choices for bedroom walls because they create a clean, flexible background. These shades work well with almost any decorating style, from contemporary to traditional.

Pure white can sometimes look stark in a room with cool lighting. Warm white or cream may create a softer atmosphere, especially when paired with wooden furniture and neutral fabrics.

To keep the room from looking flat, combine several textures. For example, white walls, cream bedding, a woven rug, and light wood furniture can create a layered appearance without introducing many different colors.

Beige and Greige for a Warm Neutral Bedroom

Beige remains popular because it adds warmth while keeping the room relatively light. Greige, which combines gray and beige undertones, offers a slightly more contemporary alternative.

These colors work well with white curtains, oak furniture, black hardware, and soft green accents. They can also make it easier to update your bedroom later because many accessories coordinate with neutral walls.

Before painting the entire room, test a sample on the wall and look at it in morning, afternoon, and evening light. A beige that looks perfect in a store may appear much more yellow once it’s on your bedroom walls.

Sage Green for a Relaxing Bedroom

Sage green is a lovely option for homeowners who want a little color without creating a bold or dramatic interior. Its muted appearance pairs beautifully with cream, white, pale wood, and natural textiles.

You could paint all four walls sage green or use it on the wall behind the bed. If you prefer a subtle approach, introduce the color through pillows, bedding, or artwork.

A sage green bedroom can feel fresh and grounded, especially when you add natural materials and soft lighting.

Blue for a Calm and Stylish Bedroom

Blue is another versatile bedroom color. Pale blue can create a light, airy look, while navy blue adds depth and a more dramatic appearance.

For a balanced design, pair dusty blue walls with white bedding and light wood furniture. If you prefer darker blue, use cream textiles and warm bedside lighting to soften the contrast.

You don’t need to paint the entire room navy to enjoy this color. A dark blue headboard or accent wall can provide enough visual interest without making the whole bedroom feel heavy.

3. Design a Beautiful Bed and Headboard Area

The bed is usually the main focal point in a bedroom. Because it takes up so much visual space, designing the area around it is one of the most effective ways to improve the entire room.

Choose a Headboard That Matches Your Style

An upholstered headboard creates a soft, comfortable appearance and works well in modern or luxury bedrooms. A wooden headboard brings natural warmth, while a simple panel headboard can make a contemporary bedroom feel more structured.

If you’re working with a small budget, you don’t have to purchase an expensive bed frame. A simple bed with an attractive headboard can look stylish when paired with coordinated bedding and thoughtful lighting.

Make sure the headboard is appropriately sized for the bed and the wall. An oversized design can overwhelm a small room, while a very small headboard may look out of proportion behind a large bed.

Create a Decorative Accent Wall

The wall behind the bed is a natural place to add visual interest. You could use a contrasting paint color, decorative wallpaper, wood-look panels, or simple framed artwork.

For a modern bedroom, consider a muted green or warm beige accent wall. For a more luxurious look, vertical wall panels behind an upholstered headboard can add depth and texture.

Keep the rest of the room relatively simple so the accent wall remains the main feature. If you add patterned wallpaper, for example, choose bedding and curtains that complement it rather than compete with it.

Layer Your Bedding for a Hotel-Inspired Look

A hotel-style bed often looks inviting because it uses layers of coordinated fabrics. You can recreate the effect with clean sheets, a duvet or comforter, a folded throw blanket, and a few decorative pillows.

Start with two or three complementary colors rather than trying to match every item exactly. White bedding with beige cushions and a muted green throw, for example, creates a soft and sophisticated combination.

The bed should still be comfortable to use. Don’t add so many pillows that you need to move half of them every night just to get into bed.

4. Choose the Right Bedroom Furniture

Bedroom furniture should fit both your design style and your daily routine. A beautiful room becomes frustrating when drawers are difficult to open, walkways are too narrow, or there’s nowhere to put everyday items.

Select the Right Bed Size

Start by measuring the room and deciding how much space the bed can reasonably occupy. A king-size bed may feel wonderful, but it isn’t always the best choice for a compact bedroom.

Consider the room’s dimensions, the location of doors and windows, and the amount of space needed to move around the bed. Whenever possible, leave comfortable walking space around the bed and enough clearance to open wardrobes and drawers.

A queen bed can be a useful compromise for many rooms, while a twin or full bed may be more practical for smaller bedrooms or guest rooms.

Add Functional Nightstands

Nightstands provide convenient storage for items such as books, glasses, chargers, and bedside lamps. Matching nightstands create a symmetrical look, but different pieces can also work if they share similar colors or visual weight.

In a small bedroom, consider a narrow nightstand or a floating bedside shelf. These options can provide a useful surface without taking up as much floor space.

Keep the top relatively clear. A lamp, a small tray, and one personal item are often enough to create an attractive arrangement.

Include a Dresser or Wardrobe

Clothing storage is essential, but large furniture can quickly make a bedroom feel crowded. Measure the available wall space before buying a dresser or wardrobe, and check the depth of the furniture as well as its width.

Tall storage can be helpful when floor space is limited, provided the furniture fits safely and doesn’t obstruct doors or windows. Built-in wardrobes are another option for making efficient use of awkward corners or alcoves.

If your bedroom already has a large closet, you may not need a bulky dresser. Reducing unnecessary furniture can make the room feel more open.

5. Make a Small Bedroom Feel Bigger

Small bedrooms can be challenging because they need to accommodate sleeping, storage, and sometimes work or study activities. The solution isn’t always to remove everything; it’s to choose items that serve a purpose and arrange them carefully.

Use Light Colors and Simple Patterns

Light-colored walls, bedding, and curtains can help a small bedroom feel brighter. White, warm beige, pale gray, and soft green are all worth considering.

Large, busy patterns may dominate a compact room, so try smaller patterns or mostly solid fabrics. You can still introduce personality with a colorful cushion, framed print, or textured blanket.

Light colors don’t magically increase the room’s dimensions, but they can make the space feel less visually crowded.

Use Mirrors to Reflect Light

A mirror can make a bedroom feel more open by reflecting light and parts of the room. A full-length mirror on a wardrobe door or a wall mirror opposite a window may help brighten the space.

Choose a size and position that fit the room. Avoid placing a mirror where it creates uncomfortable glare from direct sunlight or reflects a cluttered corner you’d rather not emphasize.

Make sure wall-mounted mirrors are properly secured, especially above areas where people sleep or walk.

Choose Multi-Functional Furniture

Multi-functional furniture is particularly useful in compact bedrooms. A bed with drawers, an ottoman with storage, or a desk that doubles as a vanity can help reduce the number of separate pieces you need.

Under-bed storage boxes can hold seasonal clothing, spare bedding, or other items you don’t use every day. Use labeled containers so you can find what you need without pulling everything out.

Another practical option is a wall-mounted bedside shelf. It provides a place for essentials while leaving the floor beneath it clear.

6. Improve Bedroom Lighting

Lighting can change the entire mood of a bedroom. A single bright ceiling light may be enough to illuminate the room, but it often doesn’t provide the cozy atmosphere many people want at the end of the day.

A combination of ambient, task, and accent lighting gives you more flexibility.

Use Warm Lighting for a Cozy Atmosphere

Warm white lighting is often a good choice for bedrooms because it creates a softer appearance than very cool, blue-white lighting. Bulbs around 2700K to 3000K are commonly used when a warm residential atmosphere is desired.

Consider using a dimmable ceiling fixture or bedside lamps so you can adjust the brightness to suit different activities. Brighter light can be useful when cleaning or getting dressed, while lower light may feel more comfortable when relaxing.

Check the bulb’s brightness, measured in lumens, as well as its color temperature. Two bulbs can have the same color temperature but produce very different amounts of light.

Add Bedside Lamps or Wall Lights

Bedside lamps provide useful light for reading and other activities. Choose lamps that suit the height of the nightstands and the overall proportions of the bed.

Wall-mounted reading lights can save surface space in smaller bedrooms. If you choose this option, make sure the light is positioned comfortably for reading without shining directly into your eyes.

For a coordinated appearance, use matching lamps on both sides of the bed. Alternatively, choose different fixtures with similar finishes to create a more relaxed, collected look.

Use Accent Lighting Carefully

LED strips behind a headboard or beneath suitable furniture can add a modern decorative effect. Small accent lights can also highlight artwork, shelves, or architectural features.

Choose products designed for the intended installation and follow the manufacturer’s electrical and ventilation instructions. Avoid placing lights where they can overheat or come into direct contact with bedding and other combustible materials.

Accent lighting should complement the main lighting rather than replace it completely.

7. Select Curtains, Rugs, and Soft Furnishings

Soft furnishings help connect the furniture, wall colors, and decorative accessories. They also influence the comfort and visual balance of the room.

Choose Curtains That Suit the Room

Floor-length curtains can make a bedroom feel taller when the curtain rod is installed appropriately above the window. Light-colored curtains can help preserve a bright appearance, while heavier fabrics may provide better privacy and light control.

If you need a dark room for sleeping, consider blackout curtains or a combination of blackout lining and decorative outer curtains. Check the window dimensions carefully so the panels cover the opening adequately.

For a minimalist bedroom, plain linen-look curtains or simple neutral panels can work beautifully. Patterned curtains may be more suitable when the rest of the room is relatively understated.

Add a Comfortable Bedroom Rug

A rug adds texture and can help define the bed area. A larger rug positioned partly beneath the bed often creates a more connected look than a small rug floating in the middle of the floor.

Choose a rug size that fits the room and allows enough space around the furniture. If you have hardwood or tile flooring, a soft rug can also provide a more comfortable surface when getting out of bed.

Use a suitable nonslip rug pad to help keep the rug in place. This is particularly important in narrow walkways and rooms used by children or older adults.

Mix Textures for a Layered Look

A bedroom can feel flat when every surface has the same texture. You can create more depth by combining cotton bedding, a knitted throw, linen curtains, a woven basket, and wooden furniture.

You don’t need many colors to make this work. A neutral bedroom can look rich and inviting when the textures are varied thoughtfully.

Start with the largest textiles, such as bedding and curtains, then add smaller accents once the overall combination feels balanced.

8. Create Smart Storage for a Clutter-Free Bedroom

A well-designed bedroom should look good without requiring constant effort to keep it tidy. Good storage makes everyday routines easier and prevents clothing, accessories, and personal items from taking over the room.

Use Under-Bed Storage

The space beneath the bed can be valuable storage, particularly in small homes. Flat containers are suitable for spare sheets, blankets, seasonal clothes, and other items that don’t need to be accessed daily.

If you are buying a new bed, consider a model with built-in drawers or a lift-up storage base. Check that you can open the drawers comfortably without blocking nearby furniture.

Keep stored items clean and dry, and avoid using the space to hide things you no longer need. Storage works best when it supports an organized routine.

Install Floating Shelves

Floating shelves can hold books, small plants, framed pictures, and decorative objects without requiring another floor-standing cabinet. They are useful above a desk or dresser, provided they’re installed securely.

Avoid filling every shelf with small accessories. Group a few items together and leave some open space to create a cleaner appearance.

Before drilling into a wall, check for electrical wiring, plumbing, and other concealed services. Use suitable fixings for the wall material and the expected load.

Organize Your Closet

An organized closet can reduce the need for additional bedroom furniture. Use drawer dividers, shelf organizers, and matching hangers where they make the space easier to use.

Store frequently worn clothing at an accessible height and move seasonal items to higher shelves or suitable storage containers. If the closet is small, consider whether some items can be stored elsewhere.

Regularly reviewing your belongings can also help. There’s little point in buying another storage cabinet if the real problem is clothing you no longer wear.

9. Add Personality With Bedroom Wall Decor

Wall decor is an easy way to make a bedroom feel personal. It can introduce color, create a focal point, and help the room feel complete without taking up valuable floor space.

Hang Artwork Above the Bed

A single large artwork or a coordinated group of smaller frames can look attractive above the headboard. Choose pieces that complement the room’s color palette and don’t overwhelm the bed.

For a calm bedroom, consider landscape photography, abstract art, botanical prints, or simple line drawings. If you prefer a more personal approach, use family photographs or artwork collected during your travels.

Hang frames securely and use appropriate wall anchors. Avoid heavy or poorly mounted objects directly above the sleeping area.

Try Decorative Wall Panels

Wall panels can add texture and architectural interest. Vertical panels may emphasize the height of a room, while upholstered panels behind the bed can create a soft, hotel-inspired appearance.

The right paneling depends on the room’s proportions and overall style. In a small bedroom, simple designs with limited visual contrast may work better than elaborate patterns.

If you’re working with a tight budget, consider paint as an alternative. A carefully planned accent wall can create a similar focal point for much less money.

Create a Personal Gallery Wall

A gallery wall is a good option if you have several smaller prints, photographs, or illustrations you want to display together. Use frames with a common color or finish to help the arrangement feel cohesive.

Lay the frames out on the floor first to test the spacing before hanging anything. This small step can save you from filling unnecessary holes in the wall.

Keep the gallery at a comfortable viewing height and avoid spreading the frames too far apart. A more compact arrangement often looks intentional and balanced.

10. Bring Nature Into Your Bedroom

Natural elements can soften a bedroom’s appearance and create a connection with the outdoors. Wood, woven materials, natural fabrics, and a few suitable plants can all help achieve this effect.

Add Indoor Plants

Plants can introduce color and texture without requiring additional artwork or decorative accessories. Depending on the light conditions, options such as pothos, snake plants, or certain types of ZZ plants may be suitable for a bedroom.

Choose plants based on their actual care requirements rather than appearance alone. A plant that needs bright indirect light may struggle in a dark corner, no matter how attractive it looks there.

Keep plant containers stable and use saucers to protect furniture and flooring from water. If you have pets, check whether the plant is toxic to them before bringing it home.

Use Natural Wood and Woven Materials

Wooden furniture, woven baskets, rattan accents, and natural-fiber rugs can create a warm, relaxed bedroom. These materials work particularly well with neutral wall colors and soft bedding.

You don’t need to replace all your furniture to introduce natural textures. A wooden tray, woven laundry basket, or small bedside stool can provide a noticeable change.

For a more coordinated look, repeat the same material in two or three places rather than using a different texture in every corner.

11. Design a Bedroom That Feels Luxurious on a Budget

Luxury is often associated with expensive furniture, but the feeling of a well-designed bedroom comes from proportion, comfort, lighting, and attention to detail. You can create an elegant appearance without purchasing everything new.

Focus on the Bed First

Because the bed is usually the largest feature, improving its appearance can make the entire room look more polished. Use clean bedding, a coordinated duvet cover, and a few well-chosen pillows.

A simple upholstered headboard or a neatly finished wooden bed frame can provide a strong foundation. You don’t need designer bedding if the colors and textures work well together.

Keep the arrangement comfortable and practical rather than copying a showroom display exactly.

Coordinate Hardware and Accessories

Small details can make a room feel more intentional. Matching finishes on drawer pulls, lamps, picture frames, and curtain hardware help connect the different elements.

Black, brushed brass, chrome, and matte nickel are all useful finishes, depending on your design style. Try to repeat a finish rather than introducing too many unrelated metals.

You can also refresh older furniture by replacing worn hardware, provided the new pieces fit correctly.

Keep Surfaces Neat

A clear nightstand or dresser allows the furniture and decorative objects to stand out. Use a small tray to group everyday items such as jewelry, a watch, or hand cream.

Hide charging cables where practical and keep laundry in a suitable hamper. These little improvements make the room easier to maintain and help preserve its finished appearance.

12. Bedroom Interior Ideas for Different Needs

The best bedroom design depends on who uses the room and how much space is available. A guest room, children’s bedroom, and shared master bedroom may all need different solutions.

Master Bedroom Interior Design

A master bedroom often benefits from a clear focal point, comfortable bedside lighting, adequate clothing storage, and coordinated textiles. If the room is large enough, a reading chair or small dressing area can provide extra functionality.

Keep the layout simple enough that the room remains easy to move through. Large furniture can look impressive, but it should never prevent access to closets, windows, or doors.

Small Guest Bedroom

A guest bedroom needs to feel welcoming while remaining practical. Choose a comfortable bed, a small nightstand, accessible lighting, and somewhere for visitors to place their belongings.

If the room is used for other purposes during the year, a daybed or a suitable storage bed may be helpful. Keep decorations relatively simple so the room works for different guests.

Provide enough space for a suitcase or a small bag if possible. These practical details can make visitors feel more comfortable.

Children’s Bedroom

Children’s bedrooms should balance fun, safety, and flexibility. Use colors and decorations that reflect the child’s interests, but consider keeping large furniture and permanent finishes relatively versatile.

Storage bins, low shelves, and accessible drawers can help children put away toys and clothing. Secure tall furniture to the wall and choose age-appropriate lighting, window coverings, and furniture.

Wall decals and removable artwork can introduce playful themes without requiring a major redesign as the child grows.

Bedroom With a Work or Study Area

If you need a desk in your bedroom, choose a position that provides adequate light and doesn’t interfere with the bed’s main walking paths. A compact desk, wall-mounted shelf, or slim chair can help conserve space.

Use a small lamp for focused tasks and storage for paperwork and electronic accessories. At the end of the workday, put away supplies or use a screen to visually separate the work area from the sleeping area.

Even a modest separation can make a multipurpose bedroom feel more organized.

13. Common Bedroom Interior Design Mistakes to Avoid

A bedroom doesn’t need to follow strict rules, but certain design choices can make it less comfortable or harder to maintain. Fortunately, most problems can be corrected without starting from scratch.

Choosing Furniture That’s Too Large

Oversized furniture can make a bedroom feel crowded and reduce useful walking space. Measure the room, check the dimensions of the furniture, and consider how doors and drawers will open before purchasing anything.

It’s also helpful to mark out the bed and dresser dimensions on the floor using painter’s tape. This gives you a better sense of the layout before moving heavy furniture into the room.

Using Too Many Colors and Patterns

Combining too many strong colors and patterns can make a bedroom feel visually busy. Start with a main color, add one or two supporting shades, and introduce contrast through small accessories.

You can still use bold prints or colorful artwork. The key is to give those features enough space so they don’t compete with everything else.

Ignoring Lighting and Window Placement

A room can feel uncomfortable when the only light source is a bright ceiling fixture or when curtains block too much natural light. Consider how daylight enters the room and where task lighting will be useful.

Use layered lighting where practical, and choose window treatments that balance privacy, light control, and appearance.

Buying Decorations Before Planning the Layout

Decorative objects are appealing, but they won’t solve problems caused by poor furniture placement or insufficient storage. Decide where the bed, wardrobe, and nightstands will go before spending money on accessories.

Once the functional layout works, add artwork, rugs, lamps, and decorative pieces to complete the design.

14. How to Plan a Bedroom Makeover Step by Step

A bedroom makeover becomes easier when you divide it into manageable stages. You don’t need to replace everything at once or complete the project in a single weekend.

Step 1: Measure the Room

Measure the walls, ceiling height, windows, doors, and major architectural features. Record the dimensions of your existing furniture and note where electrical outlets are located.

These measurements help you avoid buying a bed, wardrobe, or dresser that doesn’t fit comfortably.

Step 2: Choose a Color Palette

Select a main wall color and two or three complementary colors for bedding, curtains, and accessories. Test paint samples in the room and observe them under different lighting conditions.

If you’re keeping existing furniture, use its colors and finishes as a starting point.

Step 3: Establish the Furniture Layout

Place the bed where it can serve as the main focal point without blocking doors or windows. Position nightstands, wardrobes, and dressers so everyday movement remains comfortable.

If the room is small, prioritize the essential furniture first and add secondary pieces only if space allows.

Step 4: Set a Realistic Budget

List the items that need to be repaired, replaced, or added. Divide the budget into categories such as paint, furniture, lighting, textiles, and accessories.

Prioritize the changes that will make the biggest difference. Fresh paint, better lighting, and new bedding may be more worthwhile than replacing perfectly functional furniture.

Step 5: Add Finishing Touches

Once the major elements are in place, add curtains, rugs, artwork, plants, and a few personal decorations. Step back and look at the room from the doorway to see whether anything feels crowded or out of place.

You may find that removing a few unnecessary items creates a better result than buying more decorations.

Conclusion: Create a Bedroom Interior That Feels Like Home

A beautiful home interior for a bedroom doesn’t depend on having a large space or an unlimited budget. It comes from choosing a practical layout, selecting colors that suit the room, using comfortable furniture, and adding details that reflect your personal style.

Start with the essentials: a comfortable bed, useful storage, suitable lighting, and a coordinated color palette. Then build on those foundations with soft textiles, artwork, plants, and decorative accents that make the room feel welcoming.

If you’re working with a small bedroom, focus on space-saving furniture, light colors, and simple arrangements. If you want a luxurious appearance, pay attention to the bed, layered bedding, lighting, and finishes rather than spending money on every available accessory.

Most importantly, design your bedroom for the way you actually live. The best bedroom interior is one that looks good, supports your daily routine, and gives you a comfortable place to relax at the end of the day.

Frequently Asked Questions (FAQ)

1. What is the best interior design style for a bedroom?

The best style depends on your preferences, room size, and budget. Modern minimalist, Scandinavian, contemporary luxury, and rustic designs are all popular choices.

Choose a style that complements your existing furniture and creates the atmosphere you want.

2. Which colors are best for bedroom interiors?

Warm white, beige, greige, sage green, and soft blue are versatile choices for bedroom interiors. They can create a calm appearance and work with a wide range of furniture styles.

Test paint samples in your room before committing to a color because lighting can change how a shade appears.

3. How can I make a small bedroom look bigger?

Use light colors, keep the layout simple, and choose furniture that fits the room’s dimensions. Mirrors, wall-mounted shelves, and under-bed storage can also help make the space feel more open and organized.

Avoid blocking windows or filling every available surface with decorations.

4. How can I decorate my bedroom on a budget?

Start by rearranging your existing furniture and decluttering the room. Then consider repainting the walls, updating pillow covers, improving lighting, or adding inexpensive artwork.

Focus on a few changes that create the greatest visual impact rather than buying everything new.

5. What furniture is essential for a bedroom?

The basic essentials are a bed, a suitable mattress, and storage for clothing and personal items. Nightstands, lamps, a dresser, and a desk can be added according to your needs and available space.

The goal is to make the room functional without overcrowding it.

6. How do I make my bedroom look luxurious?

Use coordinated bedding, a well-proportioned headboard, layered lighting, and a consistent color palette. Keep surfaces organized and repeat a few complementary finishes throughout the room.

Thoughtful styling can create an elegant appearance without requiring expensive designer furniture.

7. What type of lighting is best for a bedroom?

A combination of ambient lighting, bedside task lighting, and optional accent lighting offers the most flexibility. Warm white bulbs around 2700K to 3000K are often suitable for a cozy residential atmosphere.

Consider dimmable fixtures if you want to adjust the light for reading, relaxing, or getting dressed.

8. Should bedroom walls be light or dark?

Both can work well. Light walls often make a room feel brighter, while dark colors can create depth and a more intimate atmosphere.

Consider the room’s natural light, dimensions, and furniture colors before deciding.

9. How can I make my bedroom feel more cozy?

Add soft bedding, textured blankets, comfortable rugs, warm lighting, and curtains that suit your privacy needs. Natural materials such as wood, linen, and woven fibers can also make the room feel more inviting.

Keep the arrangement uncluttered so the space remains relaxing and practical.

10. How often should I update my bedroom interior?

There is no fixed schedule for updating a bedroom. You can refresh the room whenever your needs change, furniture becomes worn, or the existing design no longer suits your preferences.

Small updates, such as new bedding, different artwork, or a fresh coat of paint, can make a noticeable difference without requiring a full renovation.

11. How do I arrange a bed in a small bedroom?

Whenever possible, position the bed so it doesn’t block doors, windows, or essential storage. Placing the headboard against a solid wall often provides a practical starting point.

Measure the room and test different layouts before moving heavy furniture. Leave enough space to get in and out of bed comfortably.

12. What are the latest bedroom interior design trends?

Popular design directions include warm neutral palettes, natural wood, textured fabrics, layered lighting, soft green shades, and multifunctional furniture. However, trends change over time, so it’s usually better to choose features that suit your lifestyle rather than redesigning your room around every new trend.

A comfortable, functional bedroom with personal details can remain attractive for years.
Building a Strong Online Presence for a Home Design Business

Building a Strong Online Presence for a Home Design Business

Homeowners often begin a renovation or decorating project with a search: how to make a small room feel larger, which flooring suits a busy family, or what to check before buying a property that needs work. For interior designers, contractors, real estate professionals, and home-related businesses, useful online content can help answer those questions and introduce potential clients to their services. The key is to build visibility by offering practical information, not by turning every article into a sales pitch.

A thoughtful online presence takes time. It involves choosing topics readers genuinely need, creating clear and accurate advice, and finding appropriate places for that advice to reach a wider audience. A few well-planned steps can make the process more manageable for a small business or independent professional.

Start With the Questions Homeowners Ask

Strong content begins with a clear understanding of its audience. A family planning a kitchen update may want to compare durable surfaces, while a first-time buyer may need a checklist for inspecting an older home. A landlord could be looking for ways to make a rental property more appealing without overspending. These are specific needs that can guide useful articles, guides, and checklists.

Collect questions from client conversations, email enquiries, and feedback after completed projects. Look for recurring concerns, such as budgeting, maintenance, accessibility, energy use, or choosing materials that suit a household’s routines. Then focus each piece on one problem. A narrow, practical topic is easier to explain well than a broad article that attempts to cover an entire renovation.

It also helps to be precise about what readers can do next. Explain the trade-offs between options, note when professional advice is sensible, and distinguish general guidance from requirements that vary by location. This builds trust and makes the information more useful than a list of product claims.

Create Content That Earns Its Place

Before publishing, check that the article offers something readers can use. For example, a guide to selecting paint for a family home might explain how lighting changes color, why washable finishes matter in high-traffic rooms, and how to test samples before painting a whole wall. A real estate article could outline questions to ask about repairs, neighborhood services, and ongoing ownership costs.

Use a straightforward structure: introduce the decision, explain the main options, and end with a short set of practical considerations. Include examples from real projects when appropriate, but protect clients’ privacy and avoid presenting one person’s experience as a universal rule. Clear headings and concise paragraphs make it easier for readers to find the part that applies to them.

Consistency matters more than publishing constantly. A realistic schedule—perhaps one carefully researched article each month—is often more sustainable than a burst of posts followed by a long pause. Revisit older material when prices, products, regulations, or common recommendations change. Accurate updates can be just as valuable as new topics.

Reach Readers Beyond Your Own Website

Publishing on your own site gives you a place to develop a resource library, but it does not guarantee that new readers will find it. Sharing a useful article through professional networks, local community groups, newsletters, or relevant publications can introduce it to people already interested in home and property topics. Choose channels based on the audience rather than trying to appear everywhere.

Guest articles can be one part of that approach. A designer might contribute a room-planning guide to a home publication, while a property professional could explain what buyers should consider before renovating. A suitable placement should reach readers who have a genuine reason to care about the subject. It should also have editorial standards that support accurate, original work. A guest post outreach service may help with the practical work of identifying relevant publications and making contact, but the business should still review each opportunity for audience fit and quality.

Do not judge a placement only by how quickly it produces enquiries. Useful articles can support reputation over time by demonstrating knowledge and giving readers a reason to return. Keep the focus on the reader’s problem, and mention a service only where it genuinely helps explain a solution.

Organize the Work and Set a Budget

Content projects involve more than writing. Research, editing, photography, graphic design, and formatting may all be needed. Small businesses can decide which tasks require their own expertise and which can be assigned to a freelancer. Someone with detailed knowledge of local building practices, for instance, may write the technical points while a professional editor improves clarity and flow.

When hiring help, define the assignment before work begins. Share the intended audience, the article’s purpose, the required format, any sources or project details to include, and the review process. Agree on a price and delivery date, and ask to see relevant samples. These steps reduce misunderstandings and make it easier to assess whether a finished piece meets the brief.

Freelance marketplaces can help businesses compare people offering different skills. Osdire is one such marketplace, with services across more than 900 categories, including writing and translation, graphics and design, marketing, photography, and other creative or technical work. Its flat pricing and payment held until a buyer approves delivered work are details that may be useful when planning a project budget and workflow.

Measure What Is Working

Review results periodically rather than reacting to every short-term change. Consider whether readers are finding the articles, spending time with them, asking relevant questions, or sharing them with others. For local businesses, enquiries from the right service area may matter more than a large number of visits from people who cannot become clients.

Use those observations to refine future topics and distribution. If an article attracts attention but does not answer readers’ questions, improve it. If a particular subject consistently helps homeowners make informed decisions, explore a related angle. A useful, steady content plan can strengthen a home business’s credibility while giving families and property owners practical guidance they can apply to real decisions.

Inside a Professional Plumbing Inspection: What to Expect

Inside a Professional Plumbing Inspection: What to Expect

A professional plumbing inspection catches hidden pipe deterioration and structural leaks before they cause thousands of dollars in water damage to your property. Most plumbing systems operate behind walls and underneath floorboards, meaning serious vulnerabilities can develop completely out of sight. A certified plumber Saratoga springs UT uses specialized equipment to evaluate your infrastructure, ensuring your water lines and drainage networks function at peak capacity. Investing in this preventative service preserves your home value and stabilizes your monthly utility costs.

  • Fixture and Supply Line Evaluation

Testing visible fixtures and supply lines reveals immediate vulnerabilities in your daily water delivery system. The inspection begins with a meticulous assessment of every faucet, showerhead, toilet, and sink connection throughout the property. Technicians check for correct water pressure, steady flow rates, and immediate drainage clearance to confirm the lines operate safely without stressing joint connections.

Low water pressure often points to hidden pipe corrosion or mineral buildup, while excessive pressure threatens to burst flexible supply lines. The examiner looks closely at the shutoff valves under your sinks and behind toilets to ensure they turn freely and isolate water flow in an emergency. Identifying weak seals or slow-dripping compression joints prevents sudden, catastrophic flooding in high-use areas of the home.

  • Main Water Heating System Diagnostics

Examining the central water heater verifies the safety mechanisms, storage tank integrity, and thermal efficiency of your appliance. A standard water heater faces constant pressure and mineral exposure, making it susceptible to premature tank failure. Inspectors check the temperature and pressure relief valve to ensure it vents correctly and prevents dangerous pressure spikes.

The technician looks for signs of external rust around the base of the tank and tests the heating elements or gas burner assemblies. Accumulate sediment at the bottom of a storage tank reduces heat transfer, driving up energy costs and accelerating steel degradation. Verifying the sacrificial anode rod condition and checking for minor leaks along the top nipples keeps your hot water supply dependable.

  • Waste Line and Drain Infrastructure Analysis

Clearing waste lines requires a deeper look into the drainage networks that carry wastewater away from your living spaces. Technicians perform comprehensive drain flow tests, observing how quickly water exits basins and checking for slow gurgling sounds that indicate venting blockages. Stubborn slow drains often signal deep grease accumulation, hair clogs, or sewer main line intrusions.

A standard assessment frequently utilizes high-resolution video camera technology fed directly into your sewer lateral to view the interior condition of underground pipes.

This video analysis tracks down cracked segments, shifting bellies, and invasive tree roots that compromise underground piping. Pinpointing these deep subterranean issues early allows for targeted hydro-jetting or localized trenchless pipe repairs before a total sewage backup occurs. Keeping these lines clear ensures your household waste management remains completely sanitary.

  • Emergency Safety and Sump Pump Inspection

Testing emergency backup systems protects your crawlspaces and basement foundations from flash flooding during heavy rainstorms. Sump pumps remain dormant for extended stretches, making regular manual activation checks essential for storm readiness. The inspector fills the pit artificially to ensure the float switch rises smoothly and triggers the motor without hesitation.

Check valves and discharge lines receive close attention to confirm wastewater flows outward rather than siphoning back into your basement. Technicians also evaluate any secondary battery backup power systems to ensure the pump remains operational during severe electrical grid outages. Securing these defense mechanisms prevents ground moisture from destroying finished basements and compromising your foundation.

Conclusion

Scheduling a comprehensive plumbing evaluation replaces guesswork with verifiable diagnostic data about your infrastructure. From tracking down water heater scale buildup to mapping underground sewer lines with digital cameras, an expert assessment prevents minor maintenance gaps from turning into costly emergency repairs. Taking charge of your property infrastructure keeps your water clean, your drains clear, and your home completely dry.

Tracking the Drip: The Most Common Causes of Water Leaks in Homes

Tracking the Drip: The Most Common Causes of Water Leaks in Homes

Undetected water leaks are silent budget killers that erode your home’s structural integrity every single day. While a catastrophic pipe burst demands immediate attention, the vast majority of residential water damage stems from slow, hidden defects that go unnoticed until mold blooms or flooring buckles. Recognizing where your plumbing system is most vulnerable allows you to intervene before a minor drip turns into an expensive remediation project. Protecting your property plumber Saratoga springs UT

 investment requires understanding the primary mechanical and environmental factors that compromise your household piping system.

Chronic High Water Pressure Stress

Excessive water pressure is the leading underlying cause of sudden pipe and fixture failure. While a high-pressure shower feels excellent, forcing water through your home’s infrastructure at a speed beyond its design limit wears down joints, valves, and flexible supply lines. This constant stress creates microscopic fissures that eventually stretch into active leaks behind your walls.

Standard residential plumbing systems function best when the water pressure is between 40 and 80 pounds per square inch. Municipal water supplies often pump water at well over one hundred pounds to reach multi-story buildings and distant neighborhoods. If your home lacks a functional pressure-reducing valve, this extreme force will systematically destroy the internal seals of your washing machine, dishwasher, and water heater, triggering multiple concurrent leaks throughout your property.

Invasive Tree Root Intrusion

Underground sewer and main water lines are highly susceptible to damage caused by nearby landscaping. Tree roots possess an incredible ability to detect moisture vapor escaping from tiny imperfections or joints in buried pipes. Once a root hair locates a hairline crack or a loose connection, it wedges its way inside to access the nutrient-rich water flowing within the line.

As the root grows, it expands inside the pipe, acting as a wedge that cracks open clay, iron, or plastic PVC conduits. This intrusion causes major underground leaks that soften the surrounding soil, eventually leading to sinkholes in your lawn or a total backup of your drainage system. Because this damage occurs entirely out of sight, monitoring your yard for random wet patches or unusually lush, vibrant patches of grass is the best way to catch an underground line failure early.

Rapid Temperature Fluctuations and Pipe Corrosion

Extreme temperature changes cause your pipes to expand and contract rapidly, placing immense mechanical strain on the joints. When freezing winter temperatures hit, the water inside an unprotected pipe can freeze, expand, and split the metal or plastic casing. The resulting fracture might initially remain blocked by ice, only to unleash a torrent of water into your crawlspace or attic the moment the weather warms and the line thaws.

Internal pipe corrosion is another unavoidable hazard, particularly in older homes equipped with galvanized steel or copper plumbing. Over decades, the natural chemicals and minerals present in municipal water react with the metal walls of your pipes, eating away at the protective lining. This chemical reaction leads to rust buildup, which thins the pipe wall until a pinhole leak develops. If you notice rust-colored water coming from your faucets or a metallic taste in your drinking water, your pipe network is actively deteriorating.

Conclusion

Preventing water damage is a matter of identifying the invisible strains affecting your plumbing infrastructure. Whether the culprit is hyper-aggressive water pressure, searching tree roots, shifting temperatures, or the natural decay of appliance hoses, leaks are the predictable result of unmanaged wear and tear. By installing a pressure gauge, upgrading weak rubber lines, and monitoring the hidden cabinets beneath your sinks, you can disrupt the cycle of decay. Maintaining a leak-free home does not require expert mechanical skill, but it does require the willingness to look closely at the hidden components that keep your household running. Taking action at the first sign of a damp spot or a spike in your utility bill ensures your property remains dry, safe, and secure.

Restaurant Epoxy Flooring: What I Learned After Seeing Cheap Floors Fail Fast

Restaurant Epoxy Flooring: What I Learned After Seeing Cheap Floors Fail Fast

Restaurant Epoxy Flooring: What I Learned After Seeing Cheap Floors Fail Fast

Why Restaurant Flooring Matters More Than Most Owners Expect

The first restaurant kitchen I ever worked around had old quarry tile flooring that looked tough as nails. But after a few years of grease buildup, cracked grout lines, and constant steam cleaning, that floor became an absolute nightmare. Staff slipped constantly, cleaning took forever, and honestly the place always looked dirtier than it really was.

That experience changed how I look at commercial restaurant flooring.

Most restaurant owners focus heavily on equipment, seating, menus, lighting, branding, all that stuff. Flooring kinda gets treated like background decoration until problems start happening. And once flooring problems begin in a restaurant, they snowball quick.

Grease seeps into cracks. Moisture gets underneath surfaces. Health inspectors notice damaged areas. Employees complain about slippery spots. Before long, the floor becomes part of daily stress.

That’s why epoxy flooring became such a popular option for restaurants, commercial kitchens, bars, breweries, cafés, and food prep areas. After seeing several restaurant epoxy flooring projects over the years — some amazing, some terrible — I can honestly say good epoxy flooring solves a lot of problems if it’s installed correctly.

And yeah… “installed correctly” matters way more than people think.

What Is Restaurant Epoxy Flooring?

Understanding Commercial Epoxy Floor Coatings

Restaurant epoxy flooring is a resin-based floor coating system applied over concrete surfaces. Once cured, it creates a durable, seamless surface designed to handle:

  • Heavy foot traffic
  • Food spills
  • Grease
  • Chemicals
  • Moisture
  • Constant cleaning

Unlike traditional tile flooring, epoxy creates fewer joints and seams where bacteria or grime can collect.

That seamless part is huge in food service environments.

I once helped clean an old restaurant kitchen where grease had literally built up inside cracked grout lines over years. It was disgusting honestly. No matter how much they mopped, the floor still smelled funky during humid days.

Epoxy flooring eliminates a lot of those hidden problem areas.

Why Restaurants Choose Epoxy Flooring

It Handles Abuse Better Than Most Floors

Restaurants absolutely destroy flooring.

People outside the industry sometimes underestimate how brutal commercial kitchens really are. Floors get hit with:

  • Hot oil
  • Dropped pans
  • Heavy carts
  • Constant moisture
  • Harsh degreasers
  • High foot traffic

And all of that happens daily.

I’ve seen cheap flooring fail in less than two years inside busy kitchens.

Why Epoxy Holds Up Well

Good restaurant epoxy flooring is:

  • Durable
  • Chemical resistant
  • Water resistant
  • Slip resistant
  • Easy to sanitize
  • Long lasting

It also looks cleaner visually because there aren’t dozens of grout lines trapping dirt.

One restaurant owner told me their nightly cleaning time dropped noticeably after switching to epoxy floors. That alone saved labor costs over time.

Types of Restaurant Epoxy Flooring

Not All Epoxy Systems Are Equal

This confused me a lot when I first started learning about commercial floor coatings.

There are several types of epoxy flooring systems, and choosing the wrong one can create expensive problems later.

Self-Leveling Epoxy Flooring

This creates a smooth seamless surface.

Best for:

  • Dining areas
  • Cafés
  • Retail food spaces

Looks modern and polished.

Quartz Epoxy Flooring

This system mixes colored quartz grains into epoxy.

Great for:

  • Slip resistance
  • Durability
  • Busy kitchens

Honestly one of my favorite options for restaurants because it balances safety and toughness really well.

Epoxy Flake Flooring

Decorative vinyl flakes are added into the coating.

Popular for:

  • Front-of-house spaces
  • Breweries
  • Casual dining restaurants

It hides dirt surprisingly well too.

Mortar Epoxy Systems

This is heavy-duty industrial stuff.

Used in:

  • Commercial kitchens
  • Food processing plants
  • High-abuse environments

Extremely durable but more expensive.

The Biggest Mistake Restaurant Owners Make

They Cheap Out on Floor Prep

I’ve seen restaurant owners spend thousands on kitchen equipment then try saving money on flooring prep work.

Huge mistake.

Epoxy flooring is only as good as the concrete underneath it.

Concrete Problems That Must Be Fixed

  • Moisture issues
  • Cracks
  • Oil contamination
  • Uneven surfaces
  • Weak concrete

If these problems aren’t addressed first, the epoxy coating eventually fails.

And failure usually looks ugly:

  • Bubbling
  • Peeling
  • Delamination
  • Cracking

I visited one restaurant where the epoxy floor started peeling near fryers less than a year after installation because grease contamination wasn’t cleaned properly before coating.

That repair cost way more than proper prep would’ve originally.

Why Slip Resistance Matters in Restaurants

Wet Floors Become Dangerous Fast

Restaurant kitchens move fast. Really fast.

During dinner rushes, people carry hot food, knives, heavy trays, and boiling liquids across those floors constantly.

One slippery area can become a workers compensation claim waiting to happen.

That’s why anti-slip epoxy flooring additives matter.

Common Slip-Resistant Additives

  • Quartz sand
  • Aluminum oxide
  • Polymer grit
  • Textured aggregates

The trick is balancing:

  • Safety
  • Cleanability

Too rough and cleaning becomes miserable. Too smooth and it gets slippery when greasy.

Good installers know how to find the middle ground.

Restaurant Areas That Benefit Most From Epoxy Flooring

Some Spaces Need It More Than Others

Not every part of a restaurant needs industrial-grade flooring.

But certain areas absolutely benefit from epoxy systems.

Commercial Kitchens

This is the biggest one.

Kitchen floors deal with:

  • Grease splatter
  • Steam
  • Chemicals
  • Constant mopping

Epoxy handles those conditions much better than many traditional flooring materials.

Walk-In Coolers and Freezers

Temperature changes destroy weaker flooring systems over time.

Dishwashing Stations

These areas stay wet almost constantly.

Bars and Beverage Stations

Spills happen nonstop here.

Dining Areas

Decorative epoxy flooring can actually look surprisingly upscale in modern restaurants.

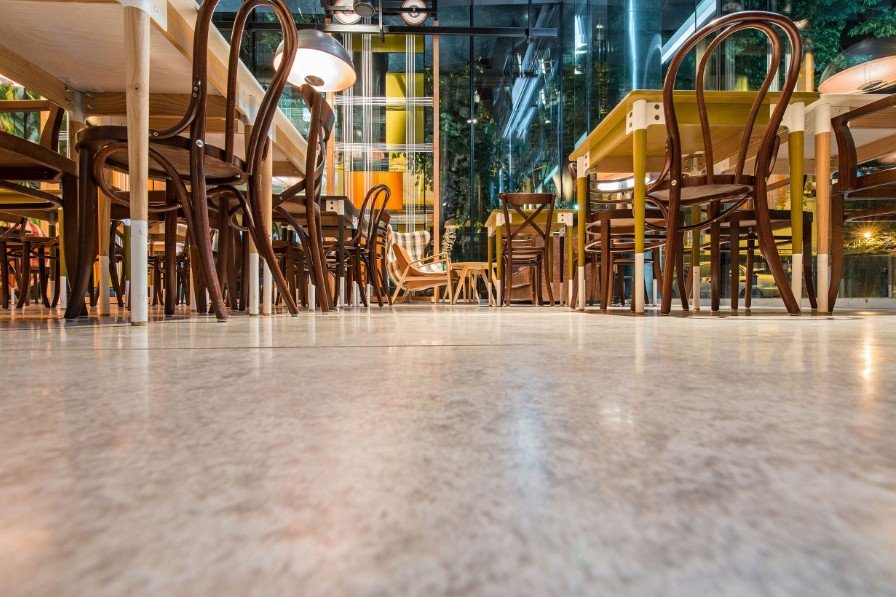
I visited a small brewery once with metallic epoxy flooring that looked almost like polished stone under soft lighting. Pretty impressive honestly.

How Restaurant Epoxy Flooring Is Installed

The Installation Process Is More Intense Than People Think

Good epoxy flooring installation isn’t just “painting the floor.”

There’s a lot involved.

Step 1: Concrete Grinding

The surface gets mechanically ground for proper adhesion.

This creates dust everywhere if containment isn’t handled correctly.

Step 2: Crack and Damage Repair

All imperfections need fixing first.

Step 3: Moisture Testing

Skipping this step can ruin the entire project later.

Step 4: Primer Application

Helps bonding strength.

Step 5: Epoxy Coating Installation

Multiple layers are often applied.

Step 6: Protective Topcoat

This adds:

  • UV resistance
  • Chemical resistance
  • Extra durability

The curing process also takes time. Restaurants sometimes underestimate downtime requirements.

I’ve seen owners panic because they expected the floor to fully cure overnight. That’s usually not realistic for heavy commercial use.

How Long Restaurant Epoxy Floors Last

Quality Installation Makes a Massive Difference

A properly installed commercial epoxy floor can last:

  • 10 years
  • 15 years
  • Sometimes longer

But poor installation cuts lifespan dramatically.

Heavy-use kitchen areas naturally wear faster than dining rooms too.

Factors That Affect Lifespan

  • Floor prep quality
  • Thickness of coating
  • Cleaning practices
  • Traffic levels
  • Chemical exposure
  • Moisture conditions

I’ve seen excellent epoxy floors still looking solid after years of abuse, while bargain installs started failing almost immediately.

Cheap bids usually hide shortcuts somewhere.

Cleaning and Maintaining Restaurant Epoxy Floors

Easier Cleaning Is a Huge Advantage

Restaurant staff already deal with enough cleaning duties.

One thing people love about epoxy flooring is how easy it is to maintain compared to tile grout.

Daily Maintenance Usually Includes

  • Sweeping debris
  • Degreasing
  • Mopping
  • Spot cleaning spills

No grout lines means fewer places for bacteria and grime to hide.

That matters big time during health inspections.

One kitchen manager told me they stopped fighting weird floor odors after replacing old tile with epoxy coating. Makes sense honestly.

Common Problems With Restaurant Epoxy Flooring

Even Good Floors Have Weaknesses

I like epoxy flooring a lot, but it’s not magic.

Hot Oil Damage

Extremely hot grease can damage certain coatings over time.

UV Exposure

Some epoxy products yellow in direct sunlight.

Improper Cleaning Chemicals

Harsh chemicals can dull finishes.

Moisture Vapor Issues

Concrete moisture problems underneath can still cause failures later.

That’s why product selection matters. Restaurant kitchens need industrial-grade systems, not garage floor kits from a home improvement store.

Those are very different things.

Epoxy Flooring vs Tile in Restaurants

My Honest Opinion After Seeing Both

Tile flooring dominated restaurants for years because it’s durable and familiar.

But grout lines become maintenance headaches eventually.

Epoxy Advantages

  • Seamless surface
  • Easier cleaning
  • Better sanitation
  • Slip-resistant options
  • Faster maintenance

Tile Advantages

  • Easier spot repairs
  • Traditional appearance
  • Heat resistance

Personally, I think epoxy wins for most commercial kitchens now.

Especially high-volume restaurants.

How Much Restaurant Epoxy Flooring Costs

Cheap Floors Usually Become Expensive Later

Restaurant epoxy flooring pricing varies a lot depending on:

  • Floor condition
  • Square footage
  • Coating type
  • Prep work
  • Custom finishes

Basic systems may cost less upfront, but high-performance coatings often save money long-term through durability.

I’ve watched restaurant owners regret bargain flooring decisions more than almost any other renovation choice honestly.

Flooring problems affect daily operations constantly.

Is Restaurant Epoxy Flooring Worth It?

My Real-World Thoughts

For busy commercial kitchens? Absolutely.

The combination of:

  • Durability
  • Sanitation
  • Moisture resistance
  • Easy cleaning
  • Slip resistance

Makes epoxy flooring hard to beat in restaurant environments.

But installation quality matters tremendously.

A properly installed epoxy floor feels like a long-term investment.

A rushed low-budget install feels like an expensive future repair bill waiting quietly in the background.

And unfortunately, you usually don’t know which one you got until months later.

Conclusion

Restaurant epoxy flooring has become one of the most practical flooring solutions for commercial kitchens, bars, cafés, breweries, and food service spaces. After seeing old tile floors crack, grout lines trap grease, and cheaper flooring systems fail under heavy use, I understand why so many restaurant owners switch to epoxy coatings.

The biggest lesson I’ve learned is that preparation and installation quality matter more than anything else. A properly prepared concrete surface combined with a commercial-grade epoxy system can create a floor that lasts for years while handling constant moisture, foot traffic, cleaning chemicals, and kitchen abuse.

It’s not the cheapest flooring option upfront, but it often becomes the cheaper option long-term because of reduced maintenance and longer lifespan. For restaurants trying to improve sanitation, durability, and overall appearance, epoxy flooring is honestly one of the smartest investments they can make.

FAQ About Restaurant Epoxy Flooring

What is restaurant epoxy flooring?

Restaurant epoxy flooring is a durable resin-based coating system applied over concrete floors to create a seamless, chemical-resistant, and easy-to-clean surface for commercial food service environments.

Why is epoxy flooring good for restaurants?

Epoxy flooring resists grease, moisture, chemicals, heavy foot traffic, and frequent cleaning. It also improves sanitation because there are fewer seams and grout lines where bacteria can collect.

Is epoxy flooring slippery in restaurant kitchens?

It can be if installed incorrectly. Most restaurant epoxy systems include slip-resistant additives like quartz or textured grit to improve safety in wet or greasy areas.

How long does restaurant epoxy flooring last?

A professionally installed commercial epoxy floor can last 10 to 15 years or longer depending on traffic levels, maintenance, and coating quality.

Can epoxy flooring handle hot grease and chemicals?

Yes, industrial-grade epoxy flooring systems are designed to resist many restaurant chemicals, oils, and grease exposure. However, extreme heat can damage lower-quality coatings.

How do you clean restaurant epoxy flooring?

Daily cleaning usually involves sweeping, degreasing, and damp mopping. Because epoxy floors are seamless, cleaning is often easier than tile flooring with grout lines.

Is epoxy flooring better than tile for restaurants?

In many commercial kitchens, yes. Epoxy flooring offers easier sanitation, fewer maintenance issues, and better moisture resistance compared to traditional tile flooring.

How long does epoxy flooring installation take?

Most restaurant epoxy flooring installations take several days including prep work, coating application, and curing time before heavy use is allowed.

Can epoxy flooring be installed over existing tile?

Sometimes, but proper surface preparation is critical. In many cases, damaged tile or unstable surfaces must be removed before installation.

Does restaurant epoxy flooring crack?

Properly installed epoxy flooring is highly durable, but underlying concrete movement or poor floor prep can eventually lead to cracking or coating failure.