Restaurant Epoxy Flooring: What I Learned After Seeing Cheap Floors Fail Fast

Restaurant Epoxy Flooring: What I Learned After Seeing Cheap Floors Fail Fast

Restaurant Epoxy Flooring: What I Learned After Seeing Cheap Floors Fail Fast

Why Restaurant Flooring Matters More Than Most Owners Expect

The first restaurant kitchen I ever worked around had old quarry tile flooring that looked tough as nails. But after a few years of grease buildup, cracked grout lines, and constant steam cleaning, that floor became an absolute nightmare. Staff slipped constantly, cleaning took forever, and honestly the place always looked dirtier than it really was.

That experience changed how I look at commercial restaurant flooring.

Most restaurant owners focus heavily on equipment, seating, menus, lighting, branding, all that stuff. Flooring kinda gets treated like background decoration until problems start happening. And once flooring problems begin in a restaurant, they snowball quick.

Grease seeps into cracks. Moisture gets underneath surfaces. Health inspectors notice damaged areas. Employees complain about slippery spots. Before long, the floor becomes part of daily stress.

That’s why epoxy flooring became such a popular option for restaurants, commercial kitchens, bars, breweries, cafés, and food prep areas. After seeing several restaurant epoxy flooring projects over the years — some amazing, some terrible — I can honestly say good epoxy flooring solves a lot of problems if it’s installed correctly.

And yeah… “installed correctly” matters way more than people think.

What Is Restaurant Epoxy Flooring?

Understanding Commercial Epoxy Floor Coatings

Restaurant epoxy flooring is a resin-based floor coating system applied over concrete surfaces. Once cured, it creates a durable, seamless surface designed to handle:

  • Heavy foot traffic
  • Food spills
  • Grease
  • Chemicals
  • Moisture
  • Constant cleaning

Unlike traditional tile flooring, epoxy creates fewer joints and seams where bacteria or grime can collect.

That seamless part is huge in food service environments.

I once helped clean an old restaurant kitchen where grease had literally built up inside cracked grout lines over years. It was disgusting honestly. No matter how much they mopped, the floor still smelled funky during humid days.

Epoxy flooring eliminates a lot of those hidden problem areas.

Why Restaurants Choose Epoxy Flooring

It Handles Abuse Better Than Most Floors

Restaurants absolutely destroy flooring.

People outside the industry sometimes underestimate how brutal commercial kitchens really are. Floors get hit with:

  • Hot oil
  • Dropped pans
  • Heavy carts
  • Constant moisture
  • Harsh degreasers
  • High foot traffic

And all of that happens daily.

I’ve seen cheap flooring fail in less than two years inside busy kitchens.

Why Epoxy Holds Up Well

Good restaurant epoxy flooring is:

  • Durable
  • Chemical resistant
  • Water resistant
  • Slip resistant
  • Easy to sanitize
  • Long lasting

It also looks cleaner visually because there aren’t dozens of grout lines trapping dirt.

One restaurant owner told me their nightly cleaning time dropped noticeably after switching to epoxy floors. That alone saved labor costs over time.

Types of Restaurant Epoxy Flooring

Not All Epoxy Systems Are Equal

This confused me a lot when I first started learning about commercial floor coatings.

There are several types of epoxy flooring systems, and choosing the wrong one can create expensive problems later.

Self-Leveling Epoxy Flooring

This creates a smooth seamless surface.

Best for:

  • Dining areas
  • Cafés
  • Retail food spaces

Looks modern and polished.

Quartz Epoxy Flooring

This system mixes colored quartz grains into epoxy.

Great for:

  • Slip resistance
  • Durability
  • Busy kitchens

Honestly one of my favorite options for restaurants because it balances safety and toughness really well.

Epoxy Flake Flooring

Decorative vinyl flakes are added into the coating.

Popular for:

  • Front-of-house spaces
  • Breweries
  • Casual dining restaurants

It hides dirt surprisingly well too.

Mortar Epoxy Systems

This is heavy-duty industrial stuff.

Used in:

  • Commercial kitchens
  • Food processing plants
  • High-abuse environments

Extremely durable but more expensive.

The Biggest Mistake Restaurant Owners Make

They Cheap Out on Floor Prep

I’ve seen restaurant owners spend thousands on kitchen equipment then try saving money on flooring prep work.

Huge mistake.

Epoxy flooring is only as good as the concrete underneath it.

Concrete Problems That Must Be Fixed

  • Moisture issues
  • Cracks
  • Oil contamination
  • Uneven surfaces
  • Weak concrete

If these problems aren’t addressed first, the epoxy coating eventually fails.

And failure usually looks ugly:

  • Bubbling
  • Peeling
  • Delamination
  • Cracking

I visited one restaurant where the epoxy floor started peeling near fryers less than a year after installation because grease contamination wasn’t cleaned properly before coating.

That repair cost way more than proper prep would’ve originally.

Why Slip Resistance Matters in Restaurants

Wet Floors Become Dangerous Fast

Restaurant kitchens move fast. Really fast.

During dinner rushes, people carry hot food, knives, heavy trays, and boiling liquids across those floors constantly.

One slippery area can become a workers compensation claim waiting to happen.

That’s why anti-slip epoxy flooring additives matter.

Common Slip-Resistant Additives

  • Quartz sand
  • Aluminum oxide
  • Polymer grit
  • Textured aggregates

The trick is balancing:

  • Safety
  • Cleanability

Too rough and cleaning becomes miserable. Too smooth and it gets slippery when greasy.

Good installers know how to find the middle ground.

Restaurant Areas That Benefit Most From Epoxy Flooring

Some Spaces Need It More Than Others

Not every part of a restaurant needs industrial-grade flooring.

But certain areas absolutely benefit from epoxy systems.

Commercial Kitchens

This is the biggest one.

Kitchen floors deal with:

  • Grease splatter
  • Steam
  • Chemicals
  • Constant mopping

Epoxy handles those conditions much better than many traditional flooring materials.

Walk-In Coolers and Freezers

Temperature changes destroy weaker flooring systems over time.

Dishwashing Stations

These areas stay wet almost constantly.

Bars and Beverage Stations

Spills happen nonstop here.

Dining Areas

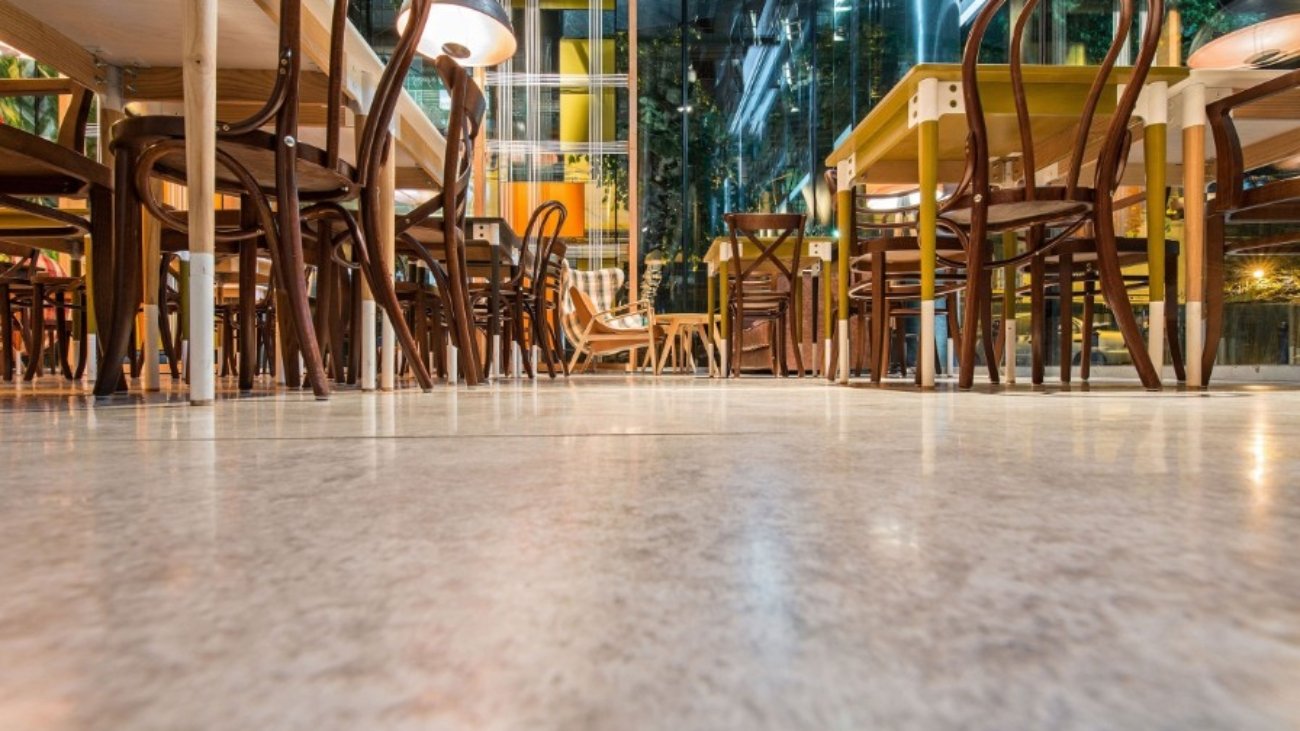
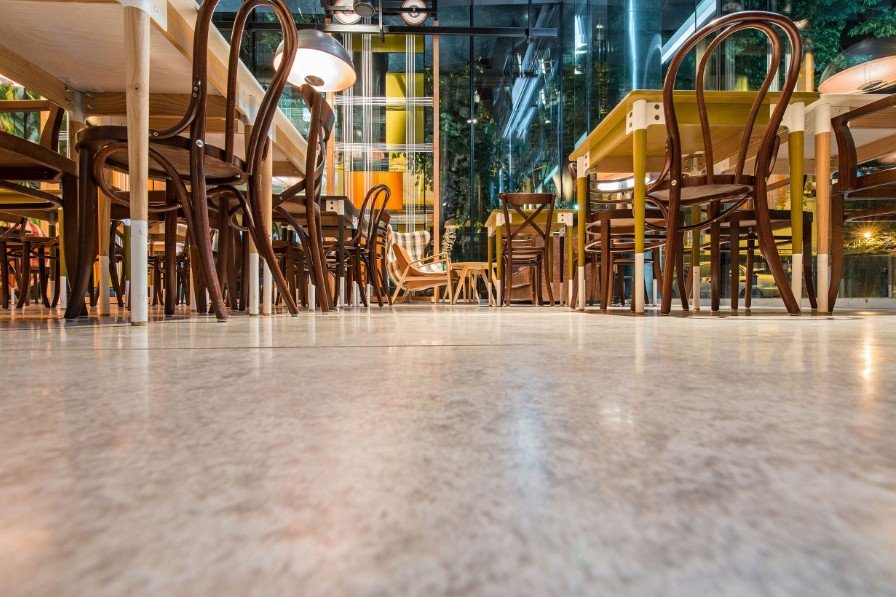
Decorative epoxy flooring can actually look surprisingly upscale in modern restaurants.

I visited a small brewery once with metallic epoxy flooring that looked almost like polished stone under soft lighting. Pretty impressive honestly.

How Restaurant Epoxy Flooring Is Installed

The Installation Process Is More Intense Than People Think

Good epoxy flooring installation isn’t just “painting the floor.”

There’s a lot involved.

Step 1: Concrete Grinding

The surface gets mechanically ground for proper adhesion.

This creates dust everywhere if containment isn’t handled correctly.

Step 2: Crack and Damage Repair

All imperfections need fixing first.

Step 3: Moisture Testing

Skipping this step can ruin the entire project later.

Step 4: Primer Application

Helps bonding strength.

Step 5: Epoxy Coating Installation

Multiple layers are often applied.

Step 6: Protective Topcoat

This adds:

  • UV resistance
  • Chemical resistance
  • Extra durability

The curing process also takes time. Restaurants sometimes underestimate downtime requirements.

I’ve seen owners panic because they expected the floor to fully cure overnight. That’s usually not realistic for heavy commercial use.

How Long Restaurant Epoxy Floors Last

Quality Installation Makes a Massive Difference

A properly installed commercial epoxy floor can last:

  • 10 years
  • 15 years
  • Sometimes longer

But poor installation cuts lifespan dramatically.

Heavy-use kitchen areas naturally wear faster than dining rooms too.

Factors That Affect Lifespan

  • Floor prep quality
  • Thickness of coating
  • Cleaning practices
  • Traffic levels
  • Chemical exposure
  • Moisture conditions

I’ve seen excellent epoxy floors still looking solid after years of abuse, while bargain installs started failing almost immediately.

Cheap bids usually hide shortcuts somewhere.

Cleaning and Maintaining Restaurant Epoxy Floors

Easier Cleaning Is a Huge Advantage

Restaurant staff already deal with enough cleaning duties.

One thing people love about epoxy flooring is how easy it is to maintain compared to tile grout.

Daily Maintenance Usually Includes

  • Sweeping debris
  • Degreasing
  • Mopping
  • Spot cleaning spills

No grout lines means fewer places for bacteria and grime to hide.

That matters big time during health inspections.

One kitchen manager told me they stopped fighting weird floor odors after replacing old tile with epoxy coating. Makes sense honestly.

Common Problems With Restaurant Epoxy Flooring

Even Good Floors Have Weaknesses

I like epoxy flooring a lot, but it’s not magic.

Hot Oil Damage

Extremely hot grease can damage certain coatings over time.

UV Exposure

Some epoxy products yellow in direct sunlight.

Improper Cleaning Chemicals

Harsh chemicals can dull finishes.

Moisture Vapor Issues

Concrete moisture problems underneath can still cause failures later.

That’s why product selection matters. Restaurant kitchens need industrial-grade systems, not garage floor kits from a home improvement store.

Those are very different things.

Epoxy Flooring vs Tile in Restaurants

My Honest Opinion After Seeing Both

Tile flooring dominated restaurants for years because it’s durable and familiar.

But grout lines become maintenance headaches eventually.

Epoxy Advantages

  • Seamless surface
  • Easier cleaning
  • Better sanitation
  • Slip-resistant options
  • Faster maintenance

Tile Advantages

  • Easier spot repairs
  • Traditional appearance
  • Heat resistance

Personally, I think epoxy wins for most commercial kitchens now.

Especially high-volume restaurants.

How Much Restaurant Epoxy Flooring Costs

Cheap Floors Usually Become Expensive Later

Restaurant epoxy flooring pricing varies a lot depending on:

  • Floor condition
  • Square footage
  • Coating type
  • Prep work
  • Custom finishes

Basic systems may cost less upfront, but high-performance coatings often save money long-term through durability.

I’ve watched restaurant owners regret bargain flooring decisions more than almost any other renovation choice honestly.

Flooring problems affect daily operations constantly.

Is Restaurant Epoxy Flooring Worth It?

My Real-World Thoughts

For busy commercial kitchens? Absolutely.

The combination of:

  • Durability
  • Sanitation
  • Moisture resistance
  • Easy cleaning
  • Slip resistance

Makes epoxy flooring hard to beat in restaurant environments.

But installation quality matters tremendously.

A properly installed epoxy floor feels like a long-term investment.

A rushed low-budget install feels like an expensive future repair bill waiting quietly in the background.

And unfortunately, you usually don’t know which one you got until months later.

Conclusion

Restaurant epoxy flooring has become one of the most practical flooring solutions for commercial kitchens, bars, cafés, breweries, and food service spaces. After seeing old tile floors crack, grout lines trap grease, and cheaper flooring systems fail under heavy use, I understand why so many restaurant owners switch to epoxy coatings.

The biggest lesson I’ve learned is that preparation and installation quality matter more than anything else. A properly prepared concrete surface combined with a commercial-grade epoxy system can create a floor that lasts for years while handling constant moisture, foot traffic, cleaning chemicals, and kitchen abuse.

It’s not the cheapest flooring option upfront, but it often becomes the cheaper option long-term because of reduced maintenance and longer lifespan. For restaurants trying to improve sanitation, durability, and overall appearance, epoxy flooring is honestly one of the smartest investments they can make.

FAQ About Restaurant Epoxy Flooring

What is restaurant epoxy flooring?

Restaurant epoxy flooring is a durable resin-based coating system applied over concrete floors to create a seamless, chemical-resistant, and easy-to-clean surface for commercial food service environments.

Why is epoxy flooring good for restaurants?

Epoxy flooring resists grease, moisture, chemicals, heavy foot traffic, and frequent cleaning. It also improves sanitation because there are fewer seams and grout lines where bacteria can collect.

Is epoxy flooring slippery in restaurant kitchens?

It can be if installed incorrectly. Most restaurant epoxy systems include slip-resistant additives like quartz or textured grit to improve safety in wet or greasy areas.

How long does restaurant epoxy flooring last?

A professionally installed commercial epoxy floor can last 10 to 15 years or longer depending on traffic levels, maintenance, and coating quality.

Can epoxy flooring handle hot grease and chemicals?

Yes, industrial-grade epoxy flooring systems are designed to resist many restaurant chemicals, oils, and grease exposure. However, extreme heat can damage lower-quality coatings.

How do you clean restaurant epoxy flooring?

Daily cleaning usually involves sweeping, degreasing, and damp mopping. Because epoxy floors are seamless, cleaning is often easier than tile flooring with grout lines.

Is epoxy flooring better than tile for restaurants?

In many commercial kitchens, yes. Epoxy flooring offers easier sanitation, fewer maintenance issues, and better moisture resistance compared to traditional tile flooring.

How long does epoxy flooring installation take?

Most restaurant epoxy flooring installations take several days including prep work, coating application, and curing time before heavy use is allowed.

Can epoxy flooring be installed over existing tile?

Sometimes, but proper surface preparation is critical. In many cases, damaged tile or unstable surfaces must be removed before installation.

Does restaurant epoxy flooring crack?

Properly installed epoxy flooring is highly durable, but underlying concrete movement or poor floor prep can eventually lead to cracking or coating failure.
Epoxy Flooring Pricing: What I Learned After Seeing Cheap Jobs Fail

Epoxy Flooring Pricing: What I Learned After Seeing Cheap Jobs Fail

Epoxy Flooring Pricing: What I Learned After Seeing Cheap Jobs Fail

Why Epoxy Flooring Prices Seem All Over the Place

The first time I got a quote for epoxy flooring, I honestly thought somebody messed up the paperwork.

One contractor quoted around $1,800 for a garage floor. Another came in over $5,000 for what looked like basically the same thing. Same garage. Same square footage. Totally different pricing.

At the time, I figured somebody was trying to rip me off. Later on though, after seeing more epoxy flooring projects and helping with a few installs myself, I realized epoxy pricing depends on way more than just the size of the floor.

And honestly, some cheap epoxy jobs really do end up costing more later.

I’ve seen bargain coatings peel within a year because the installer skipped concrete grinding. I’ve also seen professionally installed epoxy floors still looking excellent after 10 or 15 years of abuse. The difference usually comes down to:

  • Surface preparation
  • Material quality
  • Coating thickness
  • Labor experience

So if you’re researching epoxy flooring cost, this guide will help explain where the money actually goes and what pricing ranges are realistic today.

Average Epoxy Flooring Cost Per Square Foot

Typical Residential and Commercial Pricing

In 2026, most professionally installed epoxy flooring costs between:

  • $4 to $12 per square foot installed

High-end decorative or industrial systems can cost:

  • $15 to $25+ per square foot depending on complexity.

DIY epoxy kits are much cheaper:

  • Around $1 to $5 per square foot for materials only.

But here’s the thing people don’t always realize…

The coating itself is only part of the price.

Surface prep usually decides whether that floor lasts 15 years or starts peeling after one hot summer.

Typical Epoxy Flooring Prices by Project Type

Garage Epoxy Flooring Cost

This is probably the most searched epoxy project.

Standard Garage Pricing

Garage Size Typical Cost
One-car garage $750 – $3,000
Two-car garage $1,600 – $5,800
Three-car garage $3,000 – $8,000+

Professional garage epoxy flooring generally runs:

  • $4 to $12 per square foot installed depending on finish and prep needs.

I helped redo a garage once where an old DIY coating had failed completely under hot tire marks. Removing that peeling mess added over a thousand dollars before the new floor could even begin.

That was a painful lesson about “saving money.”

Basement Epoxy Flooring Pricing

Often More Expensive Than Garages

Basements can be tricky because moisture becomes a major issue.

Typical basement epoxy flooring costs:

  • $3 to $10 per square foot

Moisture barriers, crack repair, and leveling work can push costs much higher.

One basement project I saw looked fine during winter, but by humid season bubbles started forming underneath the coating because moisture testing wasn’t done properly beforehand.

Concrete moisture problems are sneaky like that.

Commercial Epoxy Flooring Costs

Restaurants, Warehouses, and Retail Spaces

Commercial epoxy flooring usually costs:

  • $5 to $15 per square foot
  • Industrial specialty systems can exceed $20 per square foot.

Restaurant kitchens, breweries, and warehouses need heavier-duty coatings because of:

  • Chemicals
  • Forklifts
  • Grease
  • Constant cleaning
  • Heavy traffic

Quartz epoxy systems and industrial self-leveling coatings cost more upfront, but they hold up better long term.

And honestly, commercial flooring failures become expensive really fast because businesses lose operating time during repairs.

Types of Epoxy Flooring and Their Prices

Basic Solid Color Epoxy

This is usually the cheapest professional option.

Typical Cost

  • $3 to $7 per square foot

Good for:

  • Utility rooms
  • Basic garages
  • Storage areas

Not super fancy visually, but durable when installed properly.

Decorative Flake Epoxy Flooring

One of the Most Popular Options

This is the classic “garage showroom” style with decorative vinyl flakes.

Typical Cost

  • $5 to $12 per square foot

Benefits:

  • Hides dirt well
  • Adds slip resistance
  • Looks more finished
  • Popular for garages and workshops

Personally, I think flake systems are the sweet spot for most homeowners.

They hide imperfections better too, which helps older concrete slabs look cleaner.

Metallic Epoxy Flooring Pricing

The Fancy Stuff Gets Expensive Fast

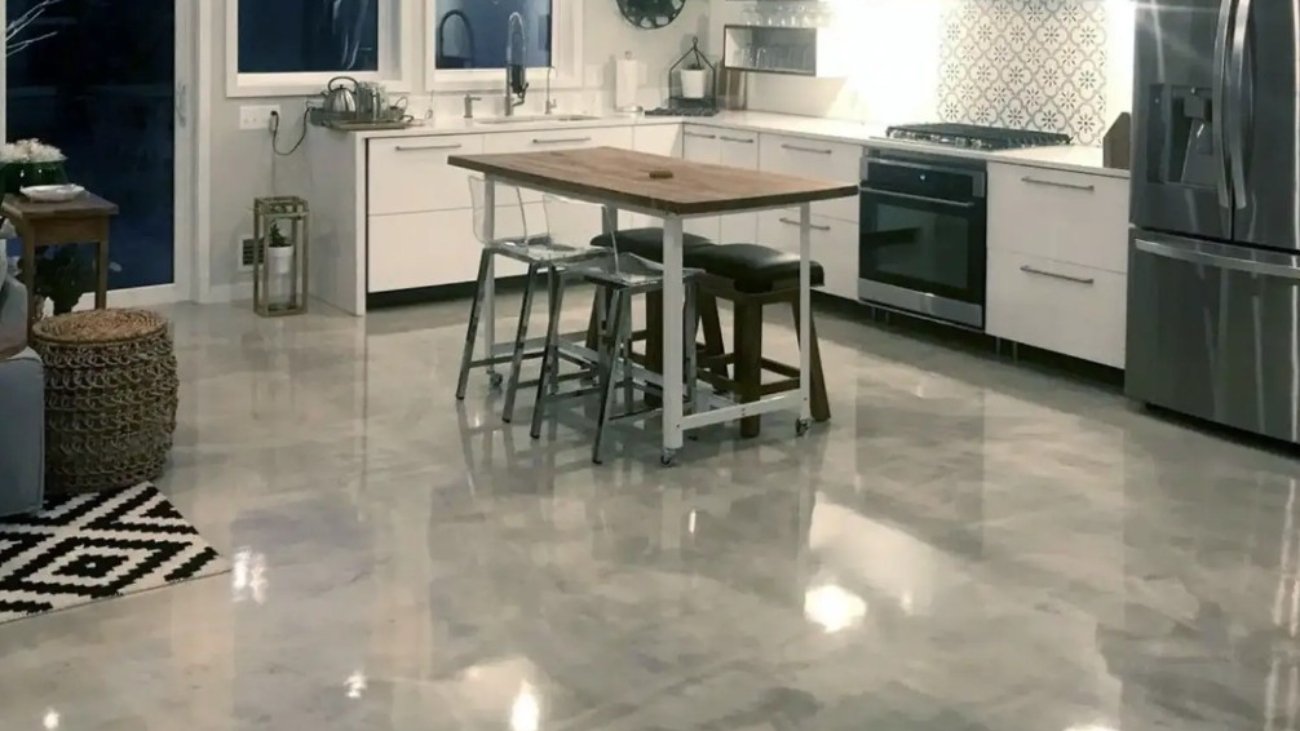
Metallic epoxy flooring creates those dramatic swirling marble-like effects.

Looks amazing when done right.

Typical Cost

  • $8 to $18+ per square foot

But metallic systems are labor intensive.

The installer basically shapes the visual pattern by hand during application. That skill level matters big time.

I saw one metallic floor that looked like polished lava rock under soft lighting. Gorgeous honestly.

I’ve also seen bad metallic installs that looked like muddy spilled paint.

Very little middle ground there.

What Affects Epoxy Flooring Pricing?

The Stuff Most Quotes Don’t Explain Clearly

This is where confusion usually happens.

Surface Preparation

This is HUGE.

Grinding concrete properly takes:

  • Specialized equipment
  • Labor
  • Dust control
  • Repair materials

Most epoxy failures happen because prep work was rushed or skipped.

One Reddit contractor said:

“The biggest cost variable isn’t the coating, it’s surface prep.”

Honestly, that’s very true.

Floor Condition

Damaged Concrete Costs More

Cracks, oil stains, moisture problems, and uneven concrete all increase labor.

You might need:

  • Crack filling
  • Moisture barriers
  • Grinding
  • Resurfacing

That work adds up quickly.

Coating Thickness

Thicker Systems Cost More

High-build industrial systems use more material.

More epoxy means:

  • Better durability
  • Better chemical resistance
  • Higher cost

Thin bargain coatings may look fine initially but wear out much faster.

Decorative Finishes

Custom Looks Increase Labor

Special colors, flakes, metallic pigments, logos, or textured finishes all increase cost.

Especially custom commercial designs.

DIY Epoxy Flooring Pricing

Cheaper Upfront, Riskier Long-Term

DIY epoxy kits usually cost:

  • $1 to $5 per square foot for materials.

That sounds tempting.

And honestly? Some DIY floors turn out decent.

But most DIY failures I’ve seen happen because:

  • Prep wasn’t thorough enough
  • Moisture wasn’t tested
  • Wrong products were used
  • Coating applied too thin

One homeowner online mentioned their bargain DIY kit peeled within six months under tire traffic.

Unfortunately, failed epoxy removal is expensive and miserable work.

Why Professional Epoxy Flooring Costs More

You’re Mostly Paying for Prep and Skill

People think contractors charge high prices just for materials.

But the real value usually comes from:

  • Diamond grinding
  • Moisture testing
  • Surface repair
  • Proper coating thickness
  • Experience

Good installers know how floors fail before they fail.

That knowledge matters.

Especially in:

  • Garages
  • Commercial kitchens
  • Warehouses
  • Humid basements

Hidden Costs People Forget About

These Surprises Catch Homeowners Off Guard

Furniture Removal

Some contractors charge extra.

Moisture Mitigation

This gets expensive quickly.

Concrete Repairs

Large cracks and spalling increase labor.

Additional Topcoats

UV-resistant polyaspartic topcoats cost extra but improve durability.

One contractor told me customers often budget only for the visible coating and completely forget the repair work underneath.

That happens constantly honestly.

Is Expensive Epoxy Flooring Worth It?

Usually Depends on How Long You Plan To Stay

If you want a quick cosmetic refresh before selling a house, maybe not.

But if you plan to keep the property for years, higher-quality systems often save money long term.

Cheap coatings:

  • Peel sooner
  • Scratch easier
  • Require replacement faster

Good epoxy floors can last:

  • 10 years
  • 15 years
  • Sometimes 20+ years with maintenance.

That durability changes the math a bit.

How to Save Money on Epoxy Flooring

Without Regretting It Later

Get Multiple Quotes

Not all installers use the same prep standards.

Ask About Grinding

Acid etching alone usually isn’t enough for long-term adhesion.

Avoid the Cheapest Bid Automatically

Cheap bids often hide shortcuts.

Pick Mid-Grade Decorative Systems

Flake epoxy gives good value without metallic pricing.

Handle Cleaning Yourself

Sometimes homeowners can save money by clearing the space beforehand.

My Honest Thoughts on Epoxy Flooring Pricing

What I’d Personally Spend Money On

If I were paying for epoxy flooring tomorrow, I’d prioritize:

  • Proper grinding
  • Moisture testing
  • Decent topcoat
  • Experienced installer

I’d rather have a simple solid-color floor installed correctly than a flashy metallic floor installed badly.

Because honestly, nobody notices fancy decorative flakes once the floor starts peeling.

And epoxy flooring repairs are almost never cheap.

Conclusion

Epoxy flooring pricing varies a lot because no two concrete floors are exactly alike. Surface condition, coating type, labor quality, moisture issues, and decorative finishes all affect the final price. While basic residential epoxy floors may start around $3 to $5 per square foot, premium commercial and decorative systems can easily exceed $15 per square foot.

The biggest lesson I’ve learned is that surface preparation matters more than almost anything else. Cheap epoxy jobs usually become expensive repairs later because shortcuts were taken during grinding, moisture testing, or crack repair.

For homeowners and business owners who want long-lasting durability, easy cleaning, and a polished appearance, professionally installed epoxy flooring is often worth the investment. Just don’t judge quotes by price alone. The cheapest number on paper sometimes becomes the most expensive floor in the long run.

FAQ About Epoxy Flooring Pricing

How much does epoxy flooring cost per square foot?

Professional epoxy flooring usually costs between $4 and $12 per square foot installed, depending on the system type and floor condition. Premium decorative or industrial coatings can cost more.

How much does it cost to epoxy a two-car garage?

Most two-car garage epoxy floors cost between $1,600 and $5,800 depending on prep work, coating thickness, and decorative finishes.

Why is epoxy flooring so expensive?

Most of the cost comes from concrete preparation, grinding, repairs, labor, and professional installation equipment — not just the epoxy material itself.

Is DIY epoxy flooring cheaper?

Yes. DIY epoxy kits usually cost around $1 to $5 per square foot for materials. However, poor preparation often causes early peeling or failure.

What is the cheapest type of epoxy flooring?

Basic solid-color epoxy coatings are generally the least expensive professional option.

What type of epoxy flooring costs the most?

Metallic epoxy flooring and industrial self-leveling systems are usually the most expensive due to labor intensity and material requirements.

How long does epoxy flooring last?

Professionally installed epoxy flooring can last 10 to 20 years depending on traffic, maintenance, and coating quality.

Does floor condition affect epoxy flooring cost?

Absolutely. Cracks, oil stains, moisture issues, and uneven concrete can significantly increase preparation costs.

Is metallic epoxy worth the extra price?

For decorative spaces like showrooms, restaurants, and modern interiors, metallic epoxy can create a dramatic high-end appearance. For garages or utility spaces, many homeowners prefer more affordable flake systems.

Can epoxy flooring increase home value?

While it may not fully recover installation costs, epoxy flooring often improves appearance, durability, and buyer appeal in garages, basements, and commercial spaces.

Vinyl Plank Flooring Near Mentor on the Lake, Ohio: The Perfect Flooring Solution for Your Home

Vinyl Plank Flooring Near Mentor on the Lake, Ohio: The Perfect Flooring Solution for Your Home

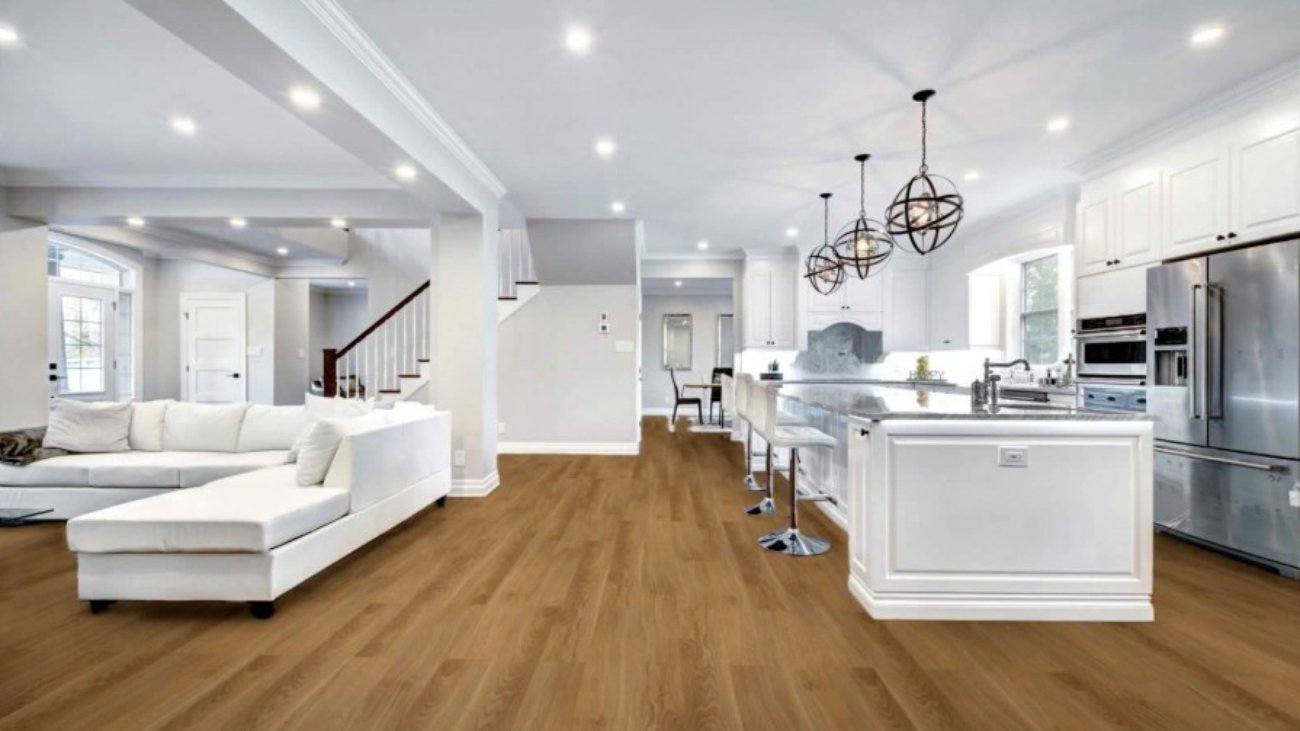
If you’re searching for vinyl plank flooring near Mentor on the Lake, Ohio, you’re in luck! This durable, stylish, and affordable flooring option is taking homes by storm, offering the perfect blend of beauty and functionality. Whether you’re renovating your living room, upgrading your basement, or transforming your garage, vinyl plank flooring provides a versatile solution that stands up to daily wear and tear.

But vinyl plank isn’t the only great option—homeowners in Mentor on the Lake are also exploring laminate tile flooring, epoxy stone garage coatings, and epoxy stone basement finishes for a seamless, high-end look. Let’s dive into why these flooring choices are ideal for Ohio homes and where you can find the best options near you.

Why Choose Vinyl Plank Flooring?

Vinyl plank flooring has become a favorite among homeowners for several reasons:

✅ Waterproof & Durable – Perfect for kitchens, bathrooms, and basements where moisture is a concern.
✅ Realistic Wood & Stone Looks – High-definition printing mimics hardwood, tile, and even concrete.
✅ Easy Installation – Many options feature click-lock systems for DIY-friendly installation.
✅ Comfort Underfoot – Softer than tile or hardwood, making it comfortable for standing long periods.

Whether you prefer a rustic oak finish or a sleek modern gray, vinyl plank flooring offers endless design possibilities.

Laminate Tile Flooring: A Budget-Friendly Alternative

While vinyl plank is a top choice, laminate tile flooring is another excellent option for those who love the look of tile without the high cost or cold feel. Laminate tile offers:

🔹 Scratch Resistance – Great for homes with pets and kids.
🔹 Easy Maintenance – No waxing or polishing needed—just sweep and mop.
🔹 Affordability – Often cheaper than real tile or hardwood.

However, laminate isn’t as water-resistant as vinyl, so it’s best suited for living rooms, bedrooms, and low-moisture areas.

Epoxy Stone Garage & Basement Floors: The Ultimate Upgrade

If you’re looking to upgrade your garage or basement, epoxy stone garage coatings and epoxy stone basement finishes are game-changers. These high-performance flooring solutions provide:

🚗 Garage Durability – Resists oil stains, tire marks, and heavy equipment.
🏠 Basement Protection – Prevents moisture damage and adds a polished look.
✨ Customizable Designs – Choose from metallic flakes, quartz blends, or solid colors.

Epoxy stone flooring is not only tough but also enhances the value of your home. It’s a popular choice for Ohio homeowners who want a sleek, industrial-chic finish that lasts for decades.

Where to Find the Best Flooring Near Mentor on the Lake, Ohio

If you’re ready to upgrade your floors, local flooring experts in Mentor on the Lake can help. Here’s what to look for in a flooring provider:

✔ Wide Selection – Offers vinyl plank, laminate, epoxy, and more.
✔ Professional Installation – Ensures a flawless finish.
✔ Free Estimates – Helps you budget your project.

Many Ohio flooring companies also provide samples, so you can test colors and textures in your home before committing.

Final Thoughts: Which Flooring Is Right for You?

  • Vinyl plank flooring= Best for moisture-prone areas (kitchens, basements, bathrooms).
  • Laminate tile flooring= Ideal for dry spaces needing a stylish, low-cost option.
  • Epoxy stone garage/basement= Perfect for high-traffic, durable surfaces.

No matter your needs, Mentor on the Lake, Ohio, has fantastic flooring solutions to match your lifestyle. Ready to transform your home? Start exploring vinyl plank flooring, laminate tile flooring, and epoxy stone options today!

Bathroom Floor Tiles: Choosing the Perfect Style and Design

Bathroom Floor Tiles: Choosing the Perfect Style and Design

Bathroom Floor Tiles: Choosing the Perfect Style and Design

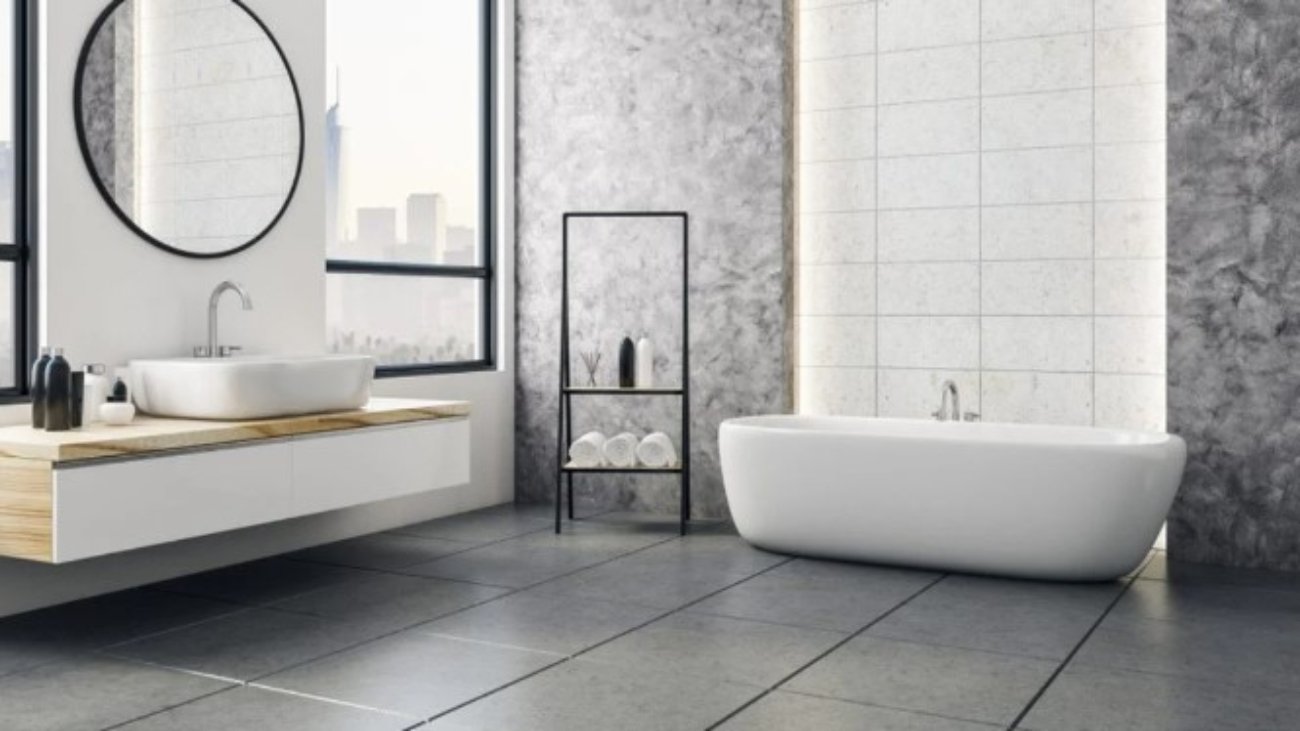
The bathroom is an essential space in any home, and the flooring plays a crucial role in its overall aesthetic and functionality. When it comes to bathroom floor tiles, making the right choice can transform your bathroom into a stylish and inviting oasis. With a wide variety of materials, designs, and patterns available, selecting the perfect tiles can be a daunting task. In this article, we will explore the factors to consider when choosing bathroom floor tiles, the different types available, popular designs and patterns, installation tips, and maintenance guidelines. Let’s dive in and discover the world of bathroom floor tiles!

Why Choose the Right Bathroom Floor Tiles?

Choosing the right bathroom floor tiles is important for several reasons. First and foremost, they need to withstand the unique challenges of a bathroom environment, including moisture, humidity, and frequent foot traffic. Additionally, bathroom floor tiles contribute to the overall style and ambiance of the space. The right tiles can elevate the bathroom’s design, making it feel more luxurious, modern, or cozy, depending on your preferences.

Factors to Consider When Choosing Bathroom Floor Tiles

Material

The material of the bathroom floor tiles is a crucial consideration. Here are some popular options:

  1. Ceramic Tiles: Ceramic tiles are a popular choice due to their affordability and versatility. They come in various colors, sizes, and patterns, making it easy to find a style that suits your bathroom.
  2. Porcelain Tiles: Porcelain tiles are known for their durability and water resistance. They are an excellent choice for bathrooms, as they are less porous than ceramic tiles and can withstand heavy use.
  3. Vinyl Tiles: Vinyl tiles are a cost-effective and low-maintenance option. They are water-resistant and comfortable underfoot, making them ideal for bathrooms.
  4. Natural Stone Tiles: Natural stone tiles, such as marble, granite, or travertine, add a touch of elegance and sophistication to any bathroom. However, they require regular sealing and maintenance.
  5. Mosaic Tiles: Mosaic tiles offer endless design possibilities. They come in small pieces and can create intricate patterns and designs, adding a unique charm to your bathroom.

Durability

Durability is a key factor, especially for a high-traffic area like the bathroom. Ensure the chosen tiles can withstand daily wear and tear without losing their beauty or functionality.

Slip Resistance

Bathrooms can become slippery, so it’s crucial to choose tiles with adequate slip resistance. Look for tiles with textured surfaces or those specifically designed to provide better traction.

Types of Bathroom Floor Tiles

There are several types of bathroom floor tiles to choose from, each with its own unique characteristics and benefits. Let’s explore some popular options:

  1. Ceramic Tiles: Ceramic tiles are a classic choice for bathroom floors. They are available in various sizes, shapes, and colors, allowing you to create different patterns and designs. Ceramic tiles are durable, water-resistant, and relatively easy to maintain. They are also affordable, making them a popular option for homeowners on a budget.
  2. Porcelain Tiles: Porcelain tiles are known for their exceptional durability and water resistance. They are denser and less porous than ceramic tiles, making them highly resistant to moisture and stains. Porcelain tiles come in a wide range of styles, including ones that mimic the look of natural stone or wood. They are an excellent choice for bathrooms with heavy foot traffic or where water exposure is a concern.
  3. Vinyl Tiles: Vinyl tiles are a versatile and cost-effective option for bathroom floors. They are available in various styles, including ones that resemble ceramic or stone tiles. Vinyl tiles are water-resistant, comfortable underfoot, and relatively easy to install. They also provide good slip resistance, making them a safe choice for bathroom flooring.
  4. Natural Stone Tiles: Natural stone tiles, such as marble, granite, or travertine, add elegance and luxury to any bathroom. Each piece of natural stone is unique, providing a one-of-a-kind look. However, natural stone tiles require regular sealing to protect them from stains and moisture. They are also generally more expensive and may require professional installation.
  5. Mosaic Tiles: Mosaic tiles are small tiles that come in various materials, including glass, ceramic, or natural stone. They allow for intricate patterns and designs, adding a touch of artistry to your bathroom floor. Mosaic tiles can be used as accents or to create entire flooring surfaces. They are a popular choice for creating focal points or adding visual interest to the bathroom.

When choosing the type of bathroom floor tiles, consider the overall style and design you want to achieve, as well as the practical aspects such as durability, maintenance, and slip resistance.

Choosing the Best Tile Size and Shape

The size and shape of bathroom floor tiles can significantly impact the overall look and feel of the space. Here are some factors to consider when selecting the best tile size and shape:

  1. Small Tiles: Small tiles, such as mosaics or subway tiles, are often used to create intricate patterns or detailed designs. They work well in small bathrooms or as accents in larger bathrooms. Small tiles can visually expand the space and add a sense of visual interest and texture.
  2. Large Tiles: Large tiles, such as 12×24 inches or 24×24 inches, can create a clean and modern look in the bathroom. They minimize the number of grout lines, giving a seamless appearance to the floor. Large tiles are also easier to clean and maintain.
  3. Rectangular Tiles: Rectangular tiles, such as 12×24 inches or 6×36 inches, can add a sense of length to the bathroom. They are ideal for creating a contemporary or elongated look. Rectangular tiles can be installed in different patterns, such as brick or herringbone, to add visual interest.
  4. Square Tiles: Square tiles, such as 12×12 inches or 18×18 inches, are a timeless choice for bathroom floors. They provide a classic and balanced look. Square tiles are versatile and can be arranged in various patterns, such as straight, diagonal, or checkerboard, depending on the desired style.

When selecting the tile size and shape, consider the size of your bathroom, the existing fixtures and fittings.

Popular Bathroom Floor Tile Designs and Patterns

Choosing the right design and pattern for your bathroom floor tiles can elevate the overall aesthetic and create a visually appealing space. Here are some popular designs and patterns to consider:

  1. Straight Lay: The straight lay pattern is the most common and straightforward design. Tiles are installed in a straight grid pattern, creating clean and symmetrical lines. This pattern works well with both square and rectangular tiles and is suitable for any bathroom style.
  2. Diagonal Lay: In the diagonal lay pattern, tiles are laid at a 45-degree angle to the walls. This pattern adds a sense of movement and visual interest to the space. Diagonal lay works best with square or rectangular tiles and can make a small bathroom appear larger.
  3. Herringbone: The herringbone pattern creates a zigzag effect by laying rectangular tiles in a 45-degree V-shape. It adds a touch of elegance and sophistication to the bathroom. Herringbone works well with smaller tiles and is often used as a focal point or accent area.
  4. Basketweave: The basketweave pattern consists of square tiles arranged in pairs to create a woven or basket-like appearance. This pattern adds texture and a classic look to the bathroom. Basketweave works best with small or medium-sized tiles and can be combined with contrasting colors for a striking effect.
  5. Chevron: The chevron pattern is similar to the herringbone but with a continuous V-shape. It creates a bold and dynamic look in the bathroom. Chevron is often used with longer rectangular tiles to emphasize the pattern and add visual impact.
  6. Checkerboard: The checkerboard pattern alternates between two contrasting tile colors, typically black and white. This classic pattern adds a retro or vintage vibe to the bathroom. It works well with square tiles and can be used to create a focal point or cover the entire floor.
  7. Mosaic Medallion: Mosaic medallions are intricate designs created using mosaic tiles. They can be placed at the center of the bathroom floor or as a decorative border. Mosaic medallions add a touch of artistry and personalization to the space.

When selecting a design or pattern, consider the overall style and theme of your bathroom, the size and shape of the tiles, and the level of visual impact you want to achieve. Experiment with different layouts and patterns to find the one that best suits your taste and complements your bathroom’s aesthetics.

Installing Bathroom Floor Tiles: Step-by-Step Guide

Installing bathroom floor tiles may seem like a complex task, but with the right preparation and guidance, it can be a rewarding DIY project. Here is a step-by-step guide to help you install your bathroom floor tiles:

Step 1: Prepare the Surface

  • Remove any existing flooring or debris from the bathroom floor.
  • Ensure the subfloor is clean, dry, and level.
  • Repair any cracks or imperfections in the subfloor.

Step 2: Plan the Layout

  • Measure the dimensions of the bathroom to determine the tile layout.
  • Use chalk lines or tile spacers to mark the starting point and layout lines on the floor.

Step 3: Prepare the Tiles

  • If necessary, cut the tiles to fit the edges and corners using a tile cutter or wet saw.
  • Sort the tiles according to their design or pattern, if applicable.

Step 4: Apply Mortar or Adhesive

  • Prepare the mortar or adhesive according to the manufacturer’s instructions.
  • Using a notched trowel, spread a thin layer of mortar or adhesive on a small section of the subfloor.

Step 5: Lay the Tiles

  • Begin laying the tiles along the layout lines, pressing them firmly into the mortar or adhesive.
  • Place tile spacers between the tiles to ensure even spacing.
  • Continue laying tiles in small sections, working your way across the floor.

Step 6: Cut and Trim Tiles

  • As you reach the edges and corners, measure and cut tiles to fit using a tile cutter or wet saw.
  • Apply mortar or adhesive to the back of the cut tiles and press them into place.

Step 7: Grouting and Sealing

  • Once all the tiles are laid and the mortar or adhesive has dried, remove the tile spacers.
  • Prepare the grout according to the manufacturer’s instructions.
  • Using a grout float, spread the grout over the tiles, ensuring all the gaps are filled.
  • Wipe off excess grout using a damp sponge, making sure not to remove grout from the gaps.
  • Allow the grout to cure for the specified time.
  • Apply a tile sealer to protect the tiles and grout from moisture and stains, following the manufacturer’s instructions.

Step 8: Cleaning and Maintenance Tips for Bathroom Floor Tiles

  • Regularly clean the tiles using a mild, non-abrasive cleaner and a soft mop or cloth.
  • Avoid using harsh chemicals or abrasive materials that can damage the tiles.
  • Clean up spills and stains promptly to prevent them from seeping into the grout.
  • Periodically check the grout for any signs of damage or discoloration and repair as needed.
  • Consider using a grout sealer to protect the grout and make cleaning easier.

Enhancing the Look with Tile Accessories

To further enhance the look of your bathroom floor tiles, you can incorporate tile accessories such as borders, accents, and trim. Here are some options to consider:

  • Borders and Accents: Add decorative borders or accent tiles to create a focal point or highlight specific areas of your bathroom floor. These can be tiles with intricate patterns, contrasting colors, or unique designs.
  • Tile Trim: Use tile trim, such as bullnose or pencil liners, along the edges of your bathroom floor tiles. Trim tiles provide a smooth and finished look while protecting the edges from chipping or damage.

By incorporating tile accessories, you can add a personalized touch and elevate the overall design of your bathroom floor.

Conclusion

Choosing the right bathroom floor tiles is essential for creating a functional, stylish, and durable space. Consider the material, durability, slip resistance, and moisture resistance when making your selection. Explore different types of tiles, such as ceramic, porcelain, vinyl, natural stone, and mosaic, to find the one that best suits your preferences and budget. Pay attention to the size and shape of the tiles, as well as popular designs and patterns like straight lay, herringbone, or mosaic medallions.

When installing bathroom floor tiles, follow a step-by-step process, ensuring proper surface preparation, adhesive application, and grouting. Clean and maintain your tiles regularly to keep them looking their best. Consider adding tile accessories like borders, accents, and trim to enhance the overall look of your bathroom floor.

With the right choices and proper installation, bathroom floor tiles can transform your bathroom into a beautiful and functional oasis for years to come.

FAQs

  1. Q: How do I choose the right tile color for my bathroom floor? A: When choosing tile color, consider the overall theme and mood you want to create. Light colors can make a small bathroom appear larger, while dark colors add depth and richness. Consider the existing colors in your bathroom, such as the walls and fixtures, and choose a tile color that complements them.
  1. Q: Are bathroom floor tiles slippery? A: While some tiles may be slippery when wet, many options offer slip-resistant surfaces. Look for tiles with textured or matte finishes, as they provide better traction. Additionally, consider using smaller tiles or mosaic patterns, as they offer more grout lines, which can enhance slip resistance.
  2. Q: How often should bathroom floor tiles be sealed? A: The frequency of sealing bathroom floor tiles depends on the type of tile and sealer used. Generally, it is recommended to seal natural stone tiles every 1 to 2 years, while ceramic or porcelain tiles may not require sealing. However, it’s best to follow the manufacturer’s recommendations for the specific tile and sealer you choose.
  3. Q: Can I install bathroom floor tiles over existing flooring? A: In some cases, it is possible to install new tiles over existing flooring. However, it’s important to ensure that the existing floor is stable, level, and in good condition. It may be necessary to remove certain types of flooring, such as carpet or multiple layers of vinyl, before installing new tiles.
  4. Q: How do I clean and maintain bathroom floor tiles? A: Regular maintenance includes sweeping or vacuuming the floor to remove dirt and debris. Clean the tiles with a mild, non-abrasive cleaner and a soft mop or cloth. Avoid using harsh chemicals or abrasive materials that can damage the tiles. Promptly clean up spills and stains to prevent them from staining the grout or tiles.

Partner Site : Financial Management, Vacation Destinations, Home Garden, Landscape Design, Home Decoration, How News Today, Healthy Lifestyle, Finance News, Business Loans, Healthy Update

Bathroom Flooring: Choosing the Perfect Surface for Your Sanctuary

Bathroom Flooring: Choosing the Perfect Surface for Your Sanctuary

Bathroom Flooring: Choosing the Perfect Surface for Your Sanctuary

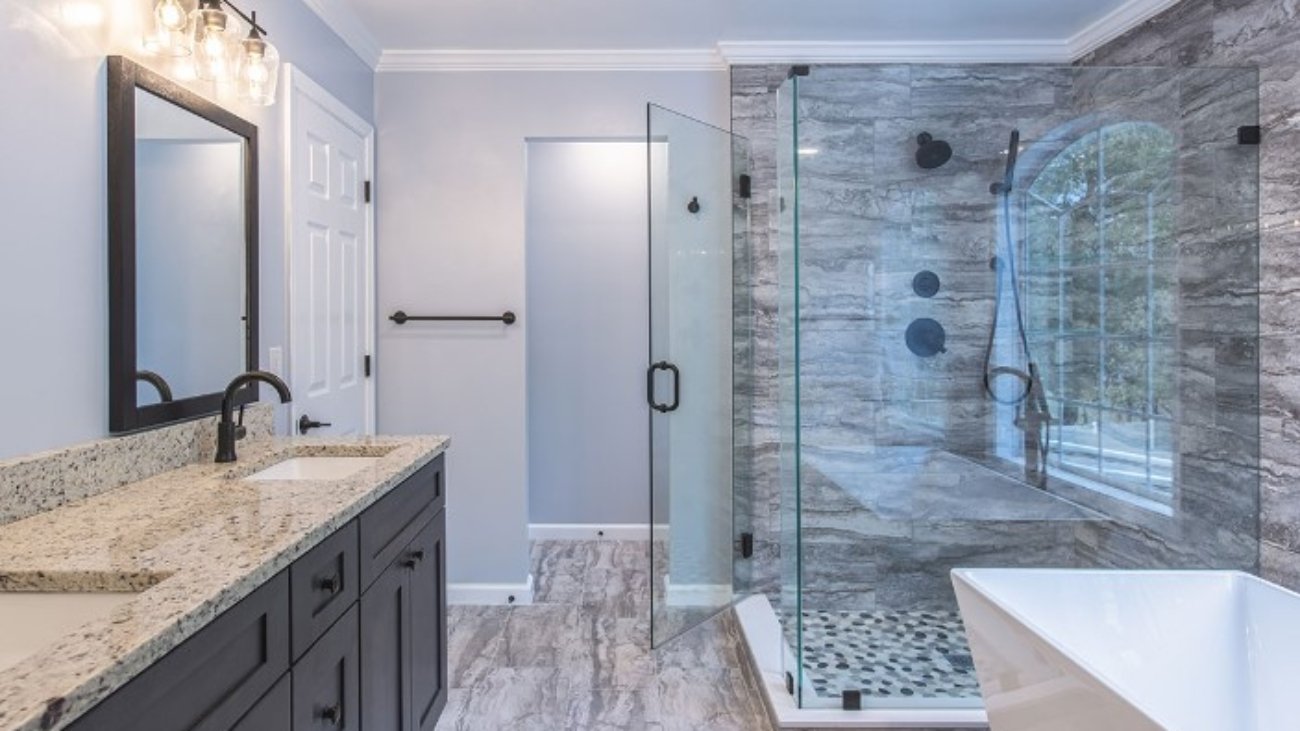
Imagine stepping into a bathroom that exudes elegance and offers a comforting ambiance. While many elements contribute to such an atmosphere, one often overlooked aspect is the flooring. The right choice of bathroom flooring not only enhances the aesthetics but also provides functionality and durability. This comprehensive guide will walk you through different types of bathroom flooring, factors to consider when making a selection, installation and maintenance tips, and much more. Discover the perfect surface for your sanctuary, and transform your bathroom into a haven of tranquility.

Introduction

When it comes to designing or renovating a bathroom, flooring plays a crucial role in setting the overall tone and creating a pleasant experience. Whether you prefer a modern, sleek look or a cozy, rustic feel, the right bathroom flooring can bring your vision to life. Additionally, bathroom floors are exposed to unique challenges, such as water spills, humidity, and high foot traffic. Therefore, it is essential to select flooring materials that can withstand these conditions and still maintain their beauty and integrity over time.

Importance of Bathroom Flooring

Bathroom flooring serves both practical and aesthetic purposes. It should be capable of withstanding moisture, provide slip resistance, be easy to clean, and complement the overall design of the space. Furthermore, since bathrooms are often smaller areas, the flooring choice can have a significant impact on the overall appearance and functionality of the room.

Factors to Consider for Bathroom Flooring Selection

Before diving into the various types of bathroom flooring available, it is crucial to consider several factors that can influence your decision-making process. These factors include water resistance, durability, slip resistance, maintenance requirements, style and design preferences, and budget considerations. By assessing these aspects, you can make an informed choice that aligns with your specific needs and preferences.

Types of Bathroom Flooring

There is a wide array of bathroom flooring options available, each with its unique characteristics, advantages, and disadvantages. Here are some popular choices:

Ceramic and Porcelain Tiles

Ceramic and porcelain tiles are widely regarded as classic choices for bathroom flooring. They are renowned for

their water resistance, durability, and versatility. Ceramic tiles are made from clay that is fired at high temperatures, while porcelain tiles are composed of denser materials, making them even more durable.

Both ceramic and porcelain tiles come in various colors, patterns, and sizes, allowing for endless design possibilities. They are easy to clean and maintain, making them ideal for bathrooms. However, it’s essential to choose tiles with a slip-resistant surface to prevent accidents.

Vinyl Flooring

Vinyl flooring has gained popularity in recent years due to its affordability, durability, and wide range of design options. It is highly water-resistant, making it suitable for bathrooms prone to moisture. Vinyl flooring comes in sheets, tiles, or planks, allowing you to choose the format that best suits your bathroom’s style.

With advancements in technology, vinyl flooring can closely mimic the look of natural materials like wood or stone without the associated maintenance concerns. It is comfortable underfoot and provides excellent slip resistance, ensuring safety in the bathroom.

Laminate Flooring

Laminate flooring offers a budget-friendly alternative to hardwood or stone flooring. It consists of multiple layers, including a high-density fiberboard core, a photographic layer that resembles the desired material, and a protective wear layer.

While laminate flooring is not as water-resistant as tiles or vinyl, it can still withstand occasional spills or moisture if promptly cleaned. It is relatively easy to install, thanks to its click-and-lock mechanism, and provides a wide range of styles and colors to choose from.

Natural Stone

For a luxurious and timeless look, natural stone flooring is an excellent choice. Options like marble, granite, limestone, and slate can add elegance and sophistication to any bathroom. Natural stone offers unique patterns and textures that cannot be replicated by any other material.

However, it’s important to note that natural stone is porous and requires sealing to resist water absorption. It may also require regular maintenance to keep its luster intact. Additionally, natural stone can be more expensive and challenging to install compared to other flooring options.

Engineered Wood

Wooden flooring creates a warm and inviting atmosphere, but traditional hardwood is not suitable for bathrooms due to its vulnerability to moisture. Engineered wood, on the other hand, is designed to withstand high humidity and moisture levels.

Engineered wood flooring is composed of multiple layers of wood veneer, topped with a protective layer. It offers the aesthetic appeal of hardwood while being more resistant to water damage. It’s important to choose engineered wood specifically designed for bathrooms to ensure its longevity and performance.

Cork Flooring

Cork flooring is a unique and eco-friendly option for bathroom flooring. It is made from the bark of cork oak trees, which naturally regenerates, making it a sustainable choice. Cork is naturally water-resistant and provides a cushioned feel underfoot.

Cork flooring offers excellent thermal and acoustic insulation properties, keeping your bathroom cozy and quiet. It is resistant to mold, mildew, and bacteria, making it a hygienic option for bathrooms. However, cork flooring requires regular sealing to maintain its water resistance and prevent damage.

Factors to Consider for Bathroom Flooring

When selecting the perfect flooring for your bathroom, it’s essential to evaluate various factors to ensure it meets your specific requirements. Consider the following:

Water Resistance

Bathrooms are prone to moisture, so choosing a flooring material with high water resistance is crucial. This will prevent water damage, mold growth, and warping. Look for flooring options specifically designed for bathrooms or those labeled as water-resistant.

Durability

Bathroom floors endure constant foot traffic, so durability is paramount. Opt for materials that can withstand wear and tear over time. Consider the expected lifespan of the flooring and choose accordingly.

Slip Resistance

Safety

is a top priority in bathrooms, where water spills can create slippery surfaces. Look for flooring options that offer good slip resistance, such as those with textured surfaces or added coatings designed to enhance traction.

Maintenance

Consider the maintenance requirements of different flooring materials. Some may require regular sealing, polishing, or specialized cleaning products. Determine how much time and effort you’re willing to invest in maintaining the flooring to keep it in optimal condition.

Style and Design

Your bathroom flooring should complement the overall style and design of the space. Consider the color palette, the desired ambiance, and the visual impact you want to achieve. Look for flooring options that offer a wide range of styles, patterns, and colors to match your preferences.

Budget

Set a budget for your bathroom flooring project. Determine how much you’re willing to spend and explore options within that range. Keep in mind that certain materials, such as natural stone or high-end tiles, may be more expensive than others.

Pros and Cons of Different Bathroom Flooring Types

Each type of bathroom flooring comes with its own set of advantages and disadvantages. Understanding these can help you make an informed decision. Let’s explore the pros and cons of popular bathroom flooring options:

Ceramic and Porcelain Tiles

Pros:

  • Excellent water resistance
  • Wide range of styles, colors, and patterns available
  • Durable and long-lasting
  • Easy to clean and maintain
  • Can increase the value of your home

Cons:

  • Can be cold underfoot
  • Grout lines require regular cleaning and maintenance

Vinyl Flooring

Pros:

  • Highly water-resistant
  • Affordable and budget-friendly
  • Comfortable underfoot
  • Offers a wide range of designs and patterns
  • Easy to install

Cons:

  • Not as durable as other options
  • Can be prone to scratches and dents over time

Laminate Flooring

Pros:

  • Affordable and cost-effective
  • Easy to install
  • Resistant to stains and fading
  • Wide range of styles and colors available

Cons:

  • Not as water-resistant as other options
  • Can warp or swell if exposed to excessive moisture

Natural Stone

Pros:

  • Luxurious and timeless appearance
  • Unique patterns and textures
  • Durable and long-lasting
  • Can increase the value of your home

Cons:

  • Requires regular sealing and maintenance
  • More expensive compared to other options
  • Cold underfoot

Engineered Wood

Pros:

  • Offers the beauty of hardwood
  • More resistant to moisture than traditional hardwood
  • Provides warmth and natural aesthetic
  • Can increase the value of your home

Cons:

  • Not as water-resistant as other options
  • Limited wood species options compared to hardwood

Cork Flooring

Pros:

  • Eco-friendly and sustainable
  • Naturally water-resistant
  • Provides cushioning and comfort underfoot
  • Resistant to mold and mildew
  • Offers excellent thermal and acoustic insulation

Cons:

  • Requires regular sealing to maintain water resistance
  • Can be prone to scratches and dents

Choosing the Right Bathroom Flooring

Now that you’re familiar with the different types of bathroom flooring and the factors to consider, it’s time to choose the right one for your specific needs. Here are some steps to help you in the decision-making process:

Consider the Bathroom’s Moisture Levels

Evaluate the moisture levels in your bathroom. If you have a high-humidity environment or frequently encounter water spills, opt for highly water-resistant flooring options like ceramic tiles, vinyl, or natural stone.

Assess Durability and Longevity

Consider the expected lifespan of the flooring and its ability to withstand heavy foot traffic. If you’re looking for long-lasting options, ceramic tiles, porcelain tiles, or natural stone can be excellent choices.

Evaluate Slip Resistance and Safety

Ensure that the flooring you choose provides adequate slip resistance to prevent accidents, especially in wet conditions. Look for textured surfaces or coatings that enhance traction and reduce the risk of slips and falls.

Determine Maintenance Requirements

Consider your willingness to invest time and effort into maintaining the flooring. Some options, like ceramic tiles or vinyl, are relatively low-maintenance and easy to clean. On the other hand, natural stone may require regular sealing and special cleaning products.

Match Style and Design Preferences

Select a flooring option that aligns with your style and design preferences. Consider the color, texture, and overall aesthetic appeal. Whether you desire a modern, rustic, or traditional look, choose a flooring material that enhances the visual appeal of your bathroom.

Budget Considerations

Set a budget for your bathroom flooring project and explore options within that range. Keep in mind that the cost can vary significantly depending on the type of material, quality, and brand. Balance your budget with your desired aesthetics and performance.

By carefully considering these factors, you can choose the right bathroom flooring that meets your requirements and enhances the overall appeal of your space.

Installation and Maintenance Tips

Once you have selected your desired bathroom flooring, proper installation and maintenance are crucial for ensuring its longevity and performance. Here are some essential tips:

Preparing the Subfloor

Ensure that the subfloor is clean, dry, and level before installing the new flooring. Any imperfections or moisture issues should be addressed to prevent future damage.

Proper Installation Techniques

Follow the manufacturer’s instructions and employ proper installation techniques. This may include using the correct adhesives, underlayment, or grouting materials. If you are unsure, consult a professional installer to ensure a seamless and secure installation.

Sealing and Grouting

If you have chosen natural stone or tiles, sealing and grouting are essential steps to enhance their water resistance and prevent staining. Follow the recommended sealing and grouting procedures and schedule regular resealing as needed.

Cleaning and Maintenance Guidelines

Adhere to the cleaning and maintenance guidelines provided by the manufacturer. Use appropriate cleaning products and methods to preserve the beauty and integrity of your bathroom flooring. Regularly clean and dry the surface to prevent the buildup of dirt, grime, and moisture.

By following these installation and maintenance tips, you can enjoy a beautiful, long-lasting bathroom flooring that withstands the test of time.

Conclusion

Choosing the right bathroom flooring is a vital decision that combines functionality, aesthetics, and durability. Whether you opt for ceramic tiles, vinyl, laminate, natural stone, engineered wood, or cork, consider the specific needs of your bathroom, your style preferences, and your budget. By assessing factors such as water resistance, durability, slip resistance, maintenance requirements, style, and cost, you can make an informed choice that transforms your bathroom into a stunning sanctuary.

Investing in high-quality bathroom flooring and following proper installation and maintenance practices will ensure that your flooring stands the test of time, providing you with a beautiful and functional space for years to come.

FAQs

1. How long does bathroom flooring typically last? The lifespan of bathroom flooring depends on various factors such as the material chosen, maintenance practices, and the level of foot traffic. Generally, well-maintained flooring can last for 10 to 20 years or more.

2. Can I install hardwood flooring in the bathroom? Traditional hardwood flooring is not recommended for bathrooms due to its vulnerability to moisture. However, you can opt for engineered wood flooring specifically designed for bathrooms, which offers better resistance to water damage.

3. Are there eco-friendly options for bathroom flooring? Yes, there are eco-friendly options available for bathroom flooring. Cork flooring, for example, is made from the bark of cork oak trees, which naturally regenerates. It is a sustainable and renewable material. Additionally, some manufacturers offer vinyl flooring made from recycled materials, contributing to environmental conservation.

4. Can I install bathroom flooring myself, or should I hire a professional? The complexity of the installation process depends on the type of flooring you choose and your level of experience. While some options like vinyl or laminate flooring can be DIY-friendly, others, such as natural stone or ceramic tiles, may require professional expertise to ensure proper installation and avoid potential issues.

5. How can I maintain and clean bathroom flooring effectively? The maintenance and cleaning requirements vary depending on the type of flooring. However, some general tips include regular sweeping or vacuuming to remove debris, promptly wiping up spills, using mild and non-abrasive cleaning solutions recommended by the manufacturer, and avoiding harsh chemicals that could damage the flooring. Be sure to follow the specific guidelines provided by the manufacturer for your chosen flooring material.

Partner Site : Business Tips , Health News, Future Technology, Home Decorating, Travel Tips, Classic Car, Online Education, Business Law, Women Fashion, Beauty Salon