Bathroom Floor Tiles: Choosing the Perfect Style and Design
The bathroom is an essential space in any home, and the flooring plays a crucial role in its overall aesthetic and functionality. When it comes to bathroom floor tiles, making the right choice can transform your bathroom into a stylish and inviting oasis. With a wide variety of materials, designs, and patterns available, selecting the perfect tiles can be a daunting task. In this article, we will explore the factors to consider when choosing bathroom floor tiles, the different types available, popular designs and patterns, installation tips, and maintenance guidelines. Let’s dive in and discover the world of bathroom floor tiles!
Why Choose the Right Bathroom Floor Tiles?
Choosing the right bathroom floor tiles is important for several reasons. First and foremost, they need to withstand the unique challenges of a bathroom environment, including moisture, humidity, and frequent foot traffic. Additionally, bathroom floor tiles contribute to the overall style and ambiance of the space. The right tiles can elevate the bathroom’s design, making it feel more luxurious, modern, or cozy, depending on your preferences.
Factors to Consider When Choosing Bathroom Floor Tiles
Material
The material of the bathroom floor tiles is a crucial consideration. Here are some popular options:
- Ceramic Tiles: Ceramic tiles are a popular choice due to their affordability and versatility. They come in various colors, sizes, and patterns, making it easy to find a style that suits your bathroom.
- Porcelain Tiles: Porcelain tiles are known for their durability and water resistance. They are an excellent choice for bathrooms, as they are less porous than ceramic tiles and can withstand heavy use.
- Vinyl Tiles: Vinyl tiles are a cost-effective and low-maintenance option. They are water-resistant and comfortable underfoot, making them ideal for bathrooms.
- Natural Stone Tiles: Natural stone tiles, such as marble, granite, or travertine, add a touch of elegance and sophistication to any bathroom. However, they require regular sealing and maintenance.
- Mosaic Tiles: Mosaic tiles offer endless design possibilities. They come in small pieces and can create intricate patterns and designs, adding a unique charm to your bathroom.
Durability
Durability is a key factor, especially for a high-traffic area like the bathroom. Ensure the chosen tiles can withstand daily wear and tear without losing their beauty or functionality.
Slip Resistance
Bathrooms can become slippery, so it’s crucial to choose tiles with adequate slip resistance. Look for tiles with textured surfaces or those specifically designed to provide better traction.
Types of Bathroom Floor Tiles
There are several types of bathroom floor tiles to choose from, each with its own unique characteristics and benefits. Let’s explore some popular options:
- Ceramic Tiles: Ceramic tiles are a classic choice for bathroom floors. They are available in various sizes, shapes, and colors, allowing you to create different patterns and designs. Ceramic tiles are durable, water-resistant, and relatively easy to maintain. They are also affordable, making them a popular option for homeowners on a budget.
- Porcelain Tiles: Porcelain tiles are known for their exceptional durability and water resistance. They are denser and less porous than ceramic tiles, making them highly resistant to moisture and stains. Porcelain tiles come in a wide range of styles, including ones that mimic the look of natural stone or wood. They are an excellent choice for bathrooms with heavy foot traffic or where water exposure is a concern.
- Vinyl Tiles: Vinyl tiles are a versatile and cost-effective option for bathroom floors. They are available in various styles, including ones that resemble ceramic or stone tiles. Vinyl tiles are water-resistant, comfortable underfoot, and relatively easy to install. They also provide good slip resistance, making them a safe choice for bathroom flooring.
- Natural Stone Tiles: Natural stone tiles, such as marble, granite, or travertine, add elegance and luxury to any bathroom. Each piece of natural stone is unique, providing a one-of-a-kind look. However, natural stone tiles require regular sealing to protect them from stains and moisture. They are also generally more expensive and may require professional installation.
- Mosaic Tiles: Mosaic tiles are small tiles that come in various materials, including glass, ceramic, or natural stone. They allow for intricate patterns and designs, adding a touch of artistry to your bathroom floor. Mosaic tiles can be used as accents or to create entire flooring surfaces. They are a popular choice for creating focal points or adding visual interest to the bathroom.
When choosing the type of bathroom floor tiles, consider the overall style and design you want to achieve, as well as the practical aspects such as durability, maintenance, and slip resistance.
Choosing the Best Tile Size and Shape
The size and shape of bathroom floor tiles can significantly impact the overall look and feel of the space. Here are some factors to consider when selecting the best tile size and shape:
- Small Tiles: Small tiles, such as mosaics or subway tiles, are often used to create intricate patterns or detailed designs. They work well in small bathrooms or as accents in larger bathrooms. Small tiles can visually expand the space and add a sense of visual interest and texture.
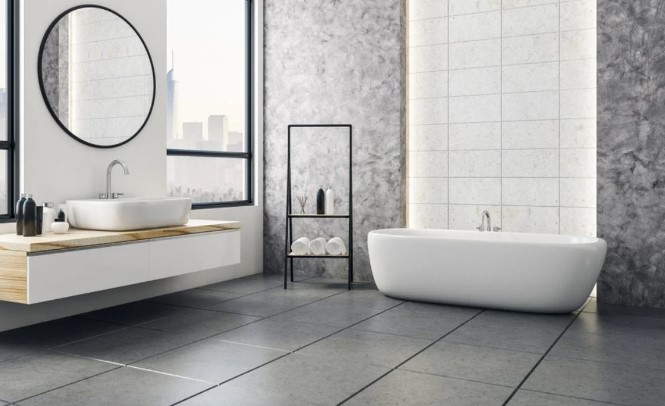
- Large Tiles: Large tiles, such as 12×24 inches or 24×24 inches, can create a clean and modern look in the bathroom. They minimize the number of grout lines, giving a seamless appearance to the floor. Large tiles are also easier to clean and maintain.
- Rectangular Tiles: Rectangular tiles, such as 12×24 inches or 6×36 inches, can add a sense of length to the bathroom. They are ideal for creating a contemporary or elongated look. Rectangular tiles can be installed in different patterns, such as brick or herringbone, to add visual interest.
- Square Tiles: Square tiles, such as 12×12 inches or 18×18 inches, are a timeless choice for bathroom floors. They provide a classic and balanced look. Square tiles are versatile and can be arranged in various patterns, such as straight, diagonal, or checkerboard, depending on the desired style.
When selecting the tile size and shape, consider the size of your bathroom, the existing fixtures and fittings.
Popular Bathroom Floor Tile Designs and Patterns
Choosing the right design and pattern for your bathroom floor tiles can elevate the overall aesthetic and create a visually appealing space. Here are some popular designs and patterns to consider:
- Straight Lay: The straight lay pattern is the most common and straightforward design. Tiles are installed in a straight grid pattern, creating clean and symmetrical lines. This pattern works well with both square and rectangular tiles and is suitable for any bathroom style.
- Diagonal Lay: In the diagonal lay pattern, tiles are laid at a 45-degree angle to the walls. This pattern adds a sense of movement and visual interest to the space. Diagonal lay works best with square or rectangular tiles and can make a small bathroom appear larger.
- Herringbone: The herringbone pattern creates a zigzag effect by laying rectangular tiles in a 45-degree V-shape. It adds a touch of elegance and sophistication to the bathroom. Herringbone works well with smaller tiles and is often used as a focal point or accent area.
- Basketweave: The basketweave pattern consists of square tiles arranged in pairs to create a woven or basket-like appearance. This pattern adds texture and a classic look to the bathroom. Basketweave works best with small or medium-sized tiles and can be combined with contrasting colors for a striking effect.
- Chevron: The chevron pattern is similar to the herringbone but with a continuous V-shape. It creates a bold and dynamic look in the bathroom. Chevron is often used with longer rectangular tiles to emphasize the pattern and add visual impact.
- Checkerboard: The checkerboard pattern alternates between two contrasting tile colors, typically black and white. This classic pattern adds a retro or vintage vibe to the bathroom. It works well with square tiles and can be used to create a focal point or cover the entire floor.
- Mosaic Medallion: Mosaic medallions are intricate designs created using mosaic tiles. They can be placed at the center of the bathroom floor or as a decorative border. Mosaic medallions add a touch of artistry and personalization to the space.
When selecting a design or pattern, consider the overall style and theme of your bathroom, the size and shape of the tiles, and the level of visual impact you want to achieve. Experiment with different layouts and patterns to find the one that best suits your taste and complements your bathroom’s aesthetics.
Installing Bathroom Floor Tiles: Step-by-Step Guide
Installing bathroom floor tiles may seem like a complex task, but with the right preparation and guidance, it can be a rewarding DIY project. Here is a step-by-step guide to help you install your bathroom floor tiles:
Step 1: Prepare the Surface
- Remove any existing flooring or debris from the bathroom floor.
- Ensure the subfloor is clean, dry, and level.
- Repair any cracks or imperfections in the subfloor.
Step 2: Plan the Layout
- Measure the dimensions of the bathroom to determine the tile layout.
- Use chalk lines or tile spacers to mark the starting point and layout lines on the floor.
Step 3: Prepare the Tiles
- If necessary, cut the tiles to fit the edges and corners using a tile cutter or wet saw.
- Sort the tiles according to their design or pattern, if applicable.
Step 4: Apply Mortar or Adhesive
- Prepare the mortar or adhesive according to the manufacturer’s instructions.
- Using a notched trowel, spread a thin layer of mortar or adhesive on a small section of the subfloor.
Step 5: Lay the Tiles
- Begin laying the tiles along the layout lines, pressing them firmly into the mortar or adhesive.
- Place tile spacers between the tiles to ensure even spacing.
- Continue laying tiles in small sections, working your way across the floor.
Step 6: Cut and Trim Tiles
- As you reach the edges and corners, measure and cut tiles to fit using a tile cutter or wet saw.
- Apply mortar or adhesive to the back of the cut tiles and press them into place.
Step 7: Grouting and Sealing
- Once all the tiles are laid and the mortar or adhesive has dried, remove the tile spacers.
- Prepare the grout according to the manufacturer’s instructions.
- Using a grout float, spread the grout over the tiles, ensuring all the gaps are filled.
- Wipe off excess grout using a damp sponge, making sure not to remove grout from the gaps.
- Allow the grout to cure for the specified time.
- Apply a tile sealer to protect the tiles and grout from moisture and stains, following the manufacturer’s instructions.
Step 8: Cleaning and Maintenance Tips for Bathroom Floor Tiles
- Regularly clean the tiles using a mild, non-abrasive cleaner and a soft mop or cloth.
- Avoid using harsh chemicals or abrasive materials that can damage the tiles.
- Clean up spills and stains promptly to prevent them from seeping into the grout.
- Periodically check the grout for any signs of damage or discoloration and repair as needed.
- Consider using a grout sealer to protect the grout and make cleaning easier.
Enhancing the Look with Tile Accessories
To further enhance the look of your bathroom floor tiles, you can incorporate tile accessories such as borders, accents, and trim. Here are some options to consider:
- Borders and Accents: Add decorative borders or accent tiles to create a focal point or highlight specific areas of your bathroom floor. These can be tiles with intricate patterns, contrasting colors, or unique designs.
- Tile Trim: Use tile trim, such as bullnose or pencil liners, along the edges of your bathroom floor tiles. Trim tiles provide a smooth and finished look while protecting the edges from chipping or damage.
By incorporating tile accessories, you can add a personalized touch and elevate the overall design of your bathroom floor.
Conclusion
Choosing the right bathroom floor tiles is essential for creating a functional, stylish, and durable space. Consider the material, durability, slip resistance, and moisture resistance when making your selection. Explore different types of tiles, such as ceramic, porcelain, vinyl, natural stone, and mosaic, to find the one that best suits your preferences and budget. Pay attention to the size and shape of the tiles, as well as popular designs and patterns like straight lay, herringbone, or mosaic medallions.
When installing bathroom floor tiles, follow a step-by-step process, ensuring proper surface preparation, adhesive application, and grouting. Clean and maintain your tiles regularly to keep them looking their best. Consider adding tile accessories like borders, accents, and trim to enhance the overall look of your bathroom floor.
With the right choices and proper installation, bathroom floor tiles can transform your bathroom into a beautiful and functional oasis for years to come.
FAQs
- Q: How do I choose the right tile color for my bathroom floor? A: When choosing tile color, consider the overall theme and mood you want to create. Light colors can make a small bathroom appear larger, while dark colors add depth and richness. Consider the existing colors in your bathroom, such as the walls and fixtures, and choose a tile color that complements them.
- Q: Are bathroom floor tiles slippery? A: While some tiles may be slippery when wet, many options offer slip-resistant surfaces. Look for tiles with textured or matte finishes, as they provide better traction. Additionally, consider using smaller tiles or mosaic patterns, as they offer more grout lines, which can enhance slip resistance.
- Q: How often should bathroom floor tiles be sealed? A: The frequency of sealing bathroom floor tiles depends on the type of tile and sealer used. Generally, it is recommended to seal natural stone tiles every 1 to 2 years, while ceramic or porcelain tiles may not require sealing. However, it’s best to follow the manufacturer’s recommendations for the specific tile and sealer you choose.
- Q: Can I install bathroom floor tiles over existing flooring? A: In some cases, it is possible to install new tiles over existing flooring. However, it’s important to ensure that the existing floor is stable, level, and in good condition. It may be necessary to remove certain types of flooring, such as carpet or multiple layers of vinyl, before installing new tiles.
-
Q: How do I clean and maintain bathroom floor tiles? A: Regular maintenance includes sweeping or vacuuming the floor to remove dirt and debris. Clean the tiles with a mild, non-abrasive cleaner and a soft mop or cloth. Avoid using harsh chemicals or abrasive materials that can damage the tiles. Promptly clean up spills and stains to prevent them from staining the grout or tiles.
Partner Site : Financial Management, Vacation Destinations, Home Garden, Landscape Design, Home Decoration, How News Today, Healthy Lifestyle, Finance News, Business Loans, Healthy Update

